According to the manufacturer's recommendation, the condition and tension of the timing belt for Duratec engines with a volume of 1.4 and 1.6 liters of Ford Fusion and Ford Fiesta cars must be checked every 20 thousand km.
Checking the timing belt tension Ford Fusion, Ford Fiesta
Remove the top cover of the timing gear drive.
Inspect the timing belt. Replace the belt if, upon inspection, you find:
– traces of oil on any surface of a belt;
- signs of wear of the toothed surface, cracks, undercuts, folds and delamination of the fabric from the rubber;
– cracks, folds, depressions or bulges on the outer surface of the belt;
- Loosening or delamination on the end surfaces of the belt.
Check belt tension. A correctly tensioned timing belt Ford Fiesta, Ford Fusion should rotate 90 ° from the force of the fingers 15–20 N (1.5–2 kgf) applied in the middle between the crankshaft and camshaft pulleys.
Adjust belt tension if necessary.
Install the parts in the reverse order of removal.
Timing Belt Replacement Ford Fusion, Ford Fiesta
According to the manufacturer's instructions, the timing belt for Duratek engines with a volume of 1.4 and 1.6 liters must be replaced after 60 thousand kilometers or 6 years of operation (whichever comes first).
Raise the front of the vehicle and place it on jack stands. Remove the right front wheel.
After cutting with a knife, remove the power steering pump drive belt.
After cutting with a knife, remove the Ford Fusion, Ford Fiesta accessory drive belt.
Set the piston of the 1st cylinder to the TDC position of the compression stroke. Do not remove the locking plate from the grooves in the rear of the camshafts, as it must fix the shafts from turning.
Turn out a bolt of fastening of a pulley of a crankshaft of the engine Ford Fusion, Ford Fiesta.
Remove the bolt and remove the crankshaft pulley.
While holding the water pump pulley from turning with a screwdriver, loosen the four bolts by rearranging the screwdriver one by one. Then finally turn out the bolts and remove the water pump pulley.
Turn out nine bolts of fastening of the top cover of the timing drive Ford Fusion, Ford Fiesta and remove the cover.
Turn out three bolts of fastening of the bottom cover of a drive of the gas-distributing mechanism and remove a cover.
Remove the right support of the power unit.
Turn out two lateral bolts of fastening of an arm of the right support of a suspension bracket of the power unit.
Turn out two forward bolts of fastening of an arm of the right support of a suspension bracket of the power unit and remove an arm.
Loosen the timing belt tension Ford Fusion, Ford Fiesta, for which, with pliers, overcoming the force of the spring, turn the movable roller bar clockwise until the holes in it and the roller bracket are aligned.
After inserting a pin of a suitable diameter into the hole, fix the roller and remove the timing belt.
Turn out a bolt of fastening of a tension roller and remove it.
Install the roller in the reverse order of removal, having previously fixed it with a rod of a suitable diameter.
Slide a new belt onto the exhaust camshaft sprocket. Tension the drive belt and slide it over the intake camshaft sprocket.
Remove the pin that secures the tension roller.
Install the lower and upper timing covers and the crankshaft pulley Ford Fusion, Ford Fiesta. Tighten the crankshaft pulley bolt in two stages: 1st stage - tighten to 45 Nm (4.5 kg/cm); Step 2 - Tighten 90°.
Remove the camshaft fixing plate.
Remove from the hole in the cylinder block the rod that fixes the crankshaft Ford Fusion, Ford Fiesta.
Engage neutral gear in the gearbox, rotate the crankshaft two revolutions and stop it before reaching TDC by about 20 °.
Insert the fixing rod into the hole of the Ford Fiesta, Ford Fusion cylinder block and carefully tighten the crankshaft until it stops with the rod.
Install the fixing plate on the camshafts. If the tool can be installed without difficulty, the timing belt is installed correctly.
If it was not possible to install the device (the valve timing is shifted), remove the belt, install the fixing device and repeat the installation of the belt.
If the timing belt is installed correctly, remove the fixing plate from the camshafts, remove the fixing rod from the hole in the cylinder block, reinstall the plug of this hole, tightening it to a torque of 20 Nm (2.0 kg / cm), and install all previously removed parts in reverse order of removal.
Replacing the Timing Chain for a 1.3L Duratec Engine on Ford Fusion, Ford Fiesta
Fig.3. Timing drive Ford Fusion, Ford Fiesta (Duratec 1.3 engine)
1 – damper axis; 2 - axis of the tensioner shoe; 3 - tensioner shoe; 4 - chain; 5 - calmer; 6 - hydraulic chain tensioner; 7 - bolt; 8 - camshaft sprocket; 9 - crankshaft sprocket
Raise the front of the vehicle and place it on a secure stand. Remove the right front wheel.
Remove the engine mudguard.
Remove the oil pump.
Set the piston of the 1st cylinder to the TDC position of the compression stroke.
Turn out the hydraulic tensioner 6 (Fig. 3) of the timing chain Ford Fusion, Ford Fiesta.
Holding the sprocket 8 from turning, unscrew the bolt 7, then remove the sprocket 8 from the camshaft.
Unscrew the axle 2 of the tensioner shoe and remove the shoe.
Remove timing chain 4 Ford Fusion, Ford Fiesta and crankshaft sprocket 9.
Install the timing chain so that a pair of painted chain links are opposite the mark on the camshaft sprocket, and another chain link marked with paint is opposite the mark on the crankshaft sprocket.
Install all removed parts in the reverse order of removal.
Replacement of oil seals for camshafts of duratec engines with a volume of 1.4 and 1.6 liters of Ford Fiesta, Ford Fusion
If traces of oil leakage through the camshaft seals are found, first check if the crankcase ventilation system is clogged and if the hoses of this system are pinched, if necessary, repair the problem. If the oil leak continues, replace the seals.
Disconnect the wire from the negative terminal of the battery.
Remove all spark plugs.
Remove the cylinder head cover.
Remove the timing belt Ford Fusion, Ford Fiesta.
Holding the camshafts from turning with a wrench on the hex sections on the shafts, unscrew the bolts securing the camshaft drive pulleys and remove the pulleys from the shafts.
Using a screwdriver, remove the oil seals from the sockets of the cylinder head.
Before installing new oil seals, inspect their working edges. They should be smooth, without tears, dents and rubber influxes. Gland springs must be intact and unstretched. Lubricate the working edges with engine oil.
Install the oil seals with the sealing lips inside the cylinder head seats, carefully fill the sealing edges on the camshafts and press them in with a suitable mandrel to the stop.
FORD FUSION TIMING BELT REPLACEMENT PRICES
The process of replacing the timing belt in a Ford Fusion car is lengthy, it will take a professional about 2 hours. Despite the seeming simplicity, we strongly do not recommend that you carry out the process of replacing the timing belt on your own, in garage conditions. Don't skimp on Ford Fusion repairs. This requires experience, as well as a set of special ford tools: camshaft and crankshaft locating pins and flywheel retainer.
A step-by-step process for replacing a timing belt with a Ford Fusion can be found on the pages of motorist forums, as well as in a printed instruction manual. At the same time, some important points to be considered when replacing the timing belt. So, for example, when the belt is removed, you cannot rotate the engine shafts by hand, so as not to knock down the valve settings. Before work, we advise you to temporarily remove the candles. And, of course, the replacement of the timing should be carried out only with the battery disconnected.
Unscheduled timing belt replacement
In some cases, it is impossible to continue driving the car, because. the timing belt is in critical condition. If you notice oil leaks on the timing belt, or cracks, delaminations, or obviously worn teeth on the inside of the belt, then it must be replaced immediately. At any moment, it can burst, while the remains of the belt can get into the rotating elements of the mechanism, causing jamming. In the best case, the belt will simply remain nearby, otherwise it may come to a major overhaul of the Ford engine.
Signs of a weak timing belt
Of course, not every Ford Fusion car owner regularly looks under the hood to check the condition of the timing belt, especially from the inside. But this is always done by the masters in the car service when undergoing Ford maintenance after Ford Fusion diagnostics.
However, without waiting for a visit to a car service, you can independently notice some that indirectly indicate a weak timing belt tension:
- excessive fuel consumption (at least compared to previous periods of the car's life);
- loss of engine power, poor acceleration.
These signs may be the cause of other Ford Fusion "diseases", such as a clogged fuel filter. Then you need to replace the Ford Fusion fuel filter. Only Ford computer diagnostics will accurately determine the cause.
Timing belt stability
Despite the fact that the timing belt "winds" hundreds of kilometers during its service life, in fact it is quite fragile. Despite the fact that the belt is based on strong cord threads, the material of the belt itself is elastic rubber. The combination of these two materials gives the timing belt tremendous wear resistance as long as it is properly tensioned during replacement.
Moreover, the rubber that is used in the manufacture of the Ford Fusion timing belt is prone to destruction when in contact with aggressive substances, such as gasoline and automobile oil. Therefore, as mentioned earlier, if you notice traces of fuels and lubricants on the Ford Fusion timing belt, get ready to replace it.
Rice. Timing belt installation diagram for FORD Fiesta, Fusion
Model: Fiesta 1.4 TDCi; Fusion 1.4 TDCi
Year: 2002-2009
Engine: F6JA, F6JB, F6JC
Replacement frequency:
- Replacement after 240,000 km or 10 years.
Belt break:
- Engine damage - YES
Service time:
- Removal and installation: 1.80 h
Special tool:
- Camshaft setting pin Ford #21-263 (303-735).
- Ford flywheel retainer #21-262 (303-734).
- Crankshaft locating pin for high-pressure fuel pump Ford No. 21-260 (303-732).
Special Instructions:
- Disconnect the battery minus.
- Do not rotate the motor shafts with the belt removed.
- Remove glow plugs to facilitate crankshaft rotation
- Rotate the crankshaft only in the direction of normal rotation.
- Do not turn the crankshaft by the camshaft gear or other gears.
- Observe the recommended tightening torques for threaded connections.
Removing the timing belt on FORD Fiesta, Fusion
- Drain the coolant.
- Raise the front of the vehicle and install the support stands.
- Disconnect the hose from the expansion tank of the engine cooling system.
- Loosen the screws attached to the expansion tank of the cooling system. Move the expansion tank to the side.
- Disconnect:
- Fuel temperature sensor connector.
- Wiring harness on top timing belt cover.
- Remove:
- Upper timing belt cover (1).
- Additional drive belt cover.
- Additional drive belt.
- Install the flywheel retainer (2). Special tool No. 303-734 (21-262).
- Remove:
- Crankshaft pulley (4).
- Flywheel retainer (2).
- Disconnect the wiring harness from the lower timing belt cover.
- Remove the lower timing belt cover (5).
- Install the crankshaft pulley bolt (3).
- Slowly turn the crankshaft clockwise until the mark on the camshaft sprocket moves to the 2 o'clock position; (6).
- Install Special Tool #303-735 (21-263).
- Insert crankshaft setting tool “8”. Special tool No. 303-732 (21-260).
- Loosen the tensioner pulley bolt (9).
- Remove:
- Tensioner roller bolt (9)
- Tensioner roller.
- Crankshaft pulley bolt (3).
- Crankshaft setting tool (8)
- Timing belt guide (10).
- Sensor rotor (11).
Note: Make sure the sensor rotor is not damaged.
- Hang the engine.
- Remove:
- GUR tank. DO NOT DISCONNECT hoses.
- Camshaft sprocket retainer (7)
- Right engine mount and bracket.
- Timing belt.
Timing belt installation on FORD Fiesta, Fusion
Note: DO NOT install a used belt. The engine must be COLD when installing the belt.
- Install:
- Tensioner roller.
- Tensioner roller bolt (9). Tighten the bolt by hand.
- Put, without pulling, the timing belt on the sprockets and pulleys.
Note: Make sure the arrow on the belt points in the direction of rotation.
- Install the right engine mount bracket.
- Tighten the bolts securing the right support bracket to the engine. Tightening torque: 60 Nm.
- Install the right engine mount.
- Tighten the bolts and nuts on the right engine mount. Tightening torque: 48 Nm.
Note: Install only new engine mount nuts.
- Install the power steering reservoir.
- Insert the HP pulley setting tool “12”. Special tool No. 303-732 (21-260).
Note: If there is no hole in the rear bracket, make sure the holes in the sprocket and cylinder block are aligned “13”.
- Remove the HP pulley setting tool (12).
- Install the camshaft sprocket retainer (7).
Note: Make sure the crankshaft sprocket key is in the 11 o'clock position.
- Install:
- Sensor rotor (11).
- Crankshaft sprocket bolt (3). Tighten the bolt by hand.
- Put on the timing belt.
- Turn the tensioner pulley counterclockwise until the pointer is aligned with the opening (14). Use a hex wrench.
- Tighten the tensioner bolt to 30 Nm (9).
- Remove:
- Crankshaft setting tool (8).
- Camshaft sprocket retainer (7).
- Install the timing belt guide (10).
- Slowly turn the crankshaft ten turns clockwise.
- Insert the crankshaft setting tool (8).
- Check that the camshaft sprocket retainer can be installed (7).
- If the retainer cannot be installed: Repeat the installation procedure.
- Remove the crankshaft adjuster (8).
- Check that the injection pump pulley setting tool can be installed (12).
Note: If there is no hole in the rear bracket, make sure the holes in the sprocket and cylinder block are aligned (13).
- If not: Repeat the installation procedure.
- Remove:
- Camshaft sprocket retainer (7).
In order for the vehicle to function normally, all of its components must be in working order. And although foreign cars do not break down as often as domestic ones, from time to time they require some maintenance and repair. Therefore, now we will tell you how the timing belt is replaced on the Ford Fusion, how often it needs to be done and what is needed for this.
In what cases is a replacement necessary?
When should the timing belt be changed? Such a replacement question occurred to every Ford Fusion owner. And not for nothing, because the gas distribution mechanism is a very important unit of the vehicle. If you do not change it in time, it can simply break off, as a result of which the operation of the vehicle will be impossible. So when should you change? The timing of the replacement is written in the service manual for the car.

However, domestic dealers advise Ford Fusion car owners to do this at least every 120 or even 100 thousand kilometers. But sometimes an element needs to be changed earlier. When? In the following cases:
- if the timing belt is already worn out enough and this can be seen from its outer surface;
- it's time to change when cracks appeared on the strap (this is especially noticeable when it is bent);
- when oil marks began to appear on the part;
- you need to change it when other defects are visible on the surface of the element (for example, the strap began to exfoliate).
Replacement instructions
We are preparing a toolkit
To, you will need:
- star key;
- set of wrenches;
- screwdrivers;
- set of heads;
- torque wrench.
Wrenches and sockets
3. Long screwdriver
Stages
To carry out the replacement work, you will need an assistant:
- First, jack up the front right wheel and remove it. After that, dismantle the motor protection and raise it slightly by substituting the support.
- Using an asterisk wrench, unscrew the screws with which the fender liner is attached, dismantle it. Using a screwdriver, unscrew the self-tapping screws of the anther, behind which the crankshaft disk is hidden.
- Loosen the screws on the air filter housing. When this is done, pry and remove the clamp to the side, and then dismantle the air pipe. Remove the filter cover.
- Using a wrench, unscrew the screws that secure the antifreeze tank, remove it. You will also need to dismantle the tank in which it is located.
- Using a wrench head, unscrew the nuts of the motor support, as well as the screws that secure it to the body. The motor support can be dismantled. After that, unscrew the screws securing the antifreeze pump. Then unscrew the screws securing the generator and dismantle the device or turn it slightly to the side.
- Now you need to remove the nine screws that secure the strap cover. The protective cover can be removed. Then, when the motor support is dismantled, unscrew the screws of its fastening, and remove the bracket to the side.
- Next, remove and lay aside the high voltage spark plug cables. Unscrew the plastic air filter guides. Also unscrew the screws that secure the valve cover. The spark plug of the first cylinder must be dismantled, and a plastic tube (at least 25 cm long) must be inserted in its place. Now you need to turn the crankshaft disk clockwise, while watching the movement of the tube. The piston of the cylinder on which the tube is installed must be set to the top dead center position.
- Then you should unscrew the plug screw, which is located in the area of \u200b\u200bthe drain hole of the motor fluid. A 4.5 cm long screw should be inserted in its place. In this case, the crankshaft should be turned, and the screw itself should be turned until the crankshaft hits it. Distribution pulleys must be fixed with metal plates.
- Now put the assistant behind the wheel and turn on the first speed, while the assistant's foot should be on the gas pedal. When this is the case, the crankshaft disc screw should be removed. Having done this, the disc can be dismantled, and then remove the lower timing belt guard. Then the unscrewed screw of the crankshaft must be tightened again and turn the pulley clockwise until it rests on the fixing screw (turn on the neutral speed).
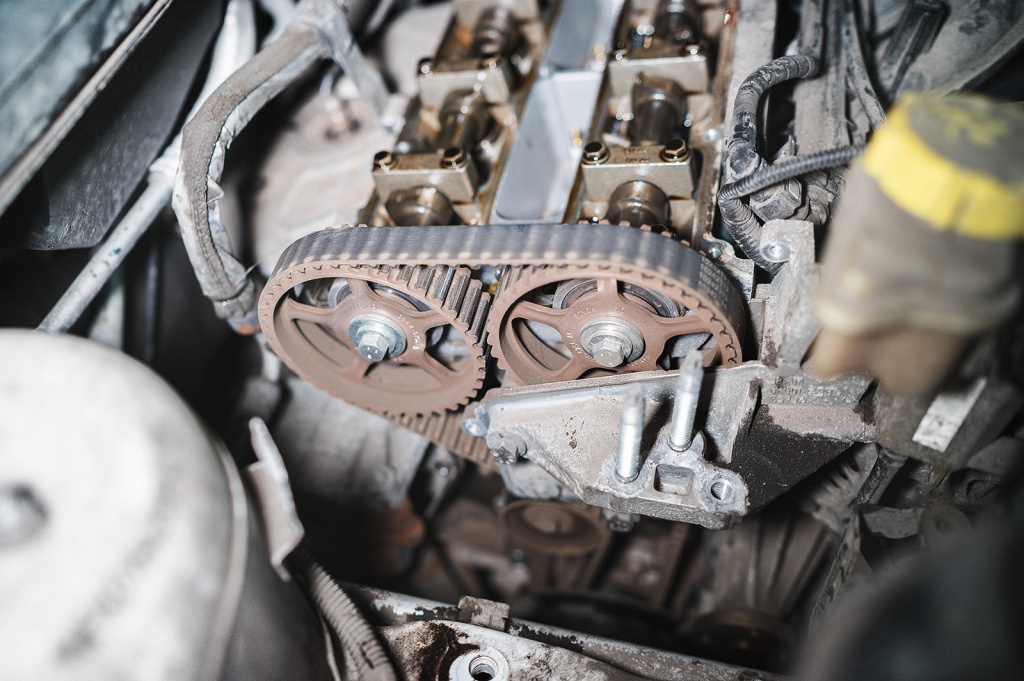
- Timing pulley sprockets and mechanism strap, as well as crankshaft strap and sprocket, must be marked.
- Unscrew the roller fixing screw and dismantle it. Tags from the old strap should be transferred to the new one.
- Next, you need to install a new element. Pay special attention to all the marks: they must be aligned not only on the strap, but also on the gears of the pulleys. Depress the roller and pull the strap over the teeth.
- Now you need to install the lower part of the protective cover in place. Mount the pulley, then tighten the screw. Be careful when doing this, as there is a chance of bending the fixing screw, so do not apply too much force.
- Next, you will need to turn on the first speed. Having done this, unscrew the fixing screw, and then dismantle the plate, which also served as the fixer. When this is done, you can completely tighten the screw of the crankshaft pulley. Here you will need a torque wrench to correctly calculate the moment. The tightening torque must be 45 Nm, after which the screw must be tightened again by 90 degrees.
- Make a few turns of the crankshaft and again set the piston to its highest point. On this, in principle, all the main work is completed. Perform all assembly steps in reverse order.
As you can see, replacing the timing belt with a Ford Fusion is quite laborious. Many procedures must be performed before reaching the replacement part. Therefore, immediately decide - can you afford it? Can you do everything on your own? Or perhaps it makes sense to turn to professionals for help?
Video "How to change the timing belt on a Ford Focus 2"
How to change the timing belt on a Ford Focus 2 at home - look at the video.
The scheduled replacement of the Ford Fusion timing belt is usually carried out with runs far over one hundred thousand kilometers, however, for our regions, the manufacturer has reduced the guaranteed mileage, and the saying “You can’t spoil the porridge with oil” is most welcome here - it’s easier to change than to bite your elbows later.
Given:
Automobile:
- Year of issue: 2010
- Engine: 1.6l
- ICE Features: Gasoline
- Gearbox: Automatic
- Drive: Front
- Mileage: 73500
Required:
With all adjacent elements
First of all, we drive the car to the sink so as not to wipe the body with working clothes: it’s not aesthetically pleasing, and you’ll save enough clothes and scratch the paint in no time.
Swing the air filter housing aside.

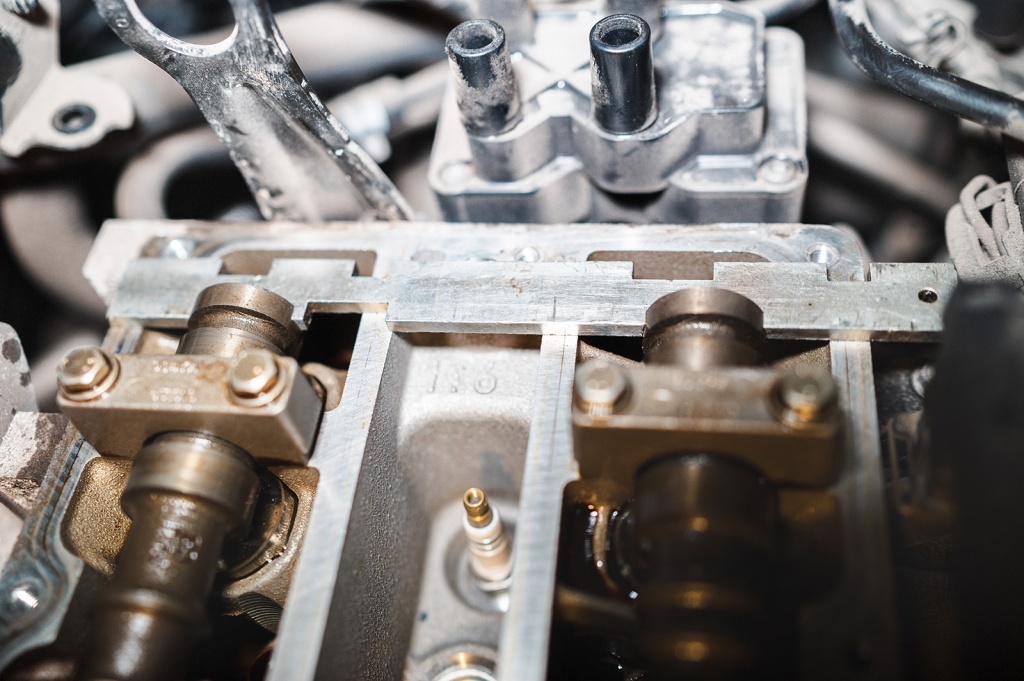
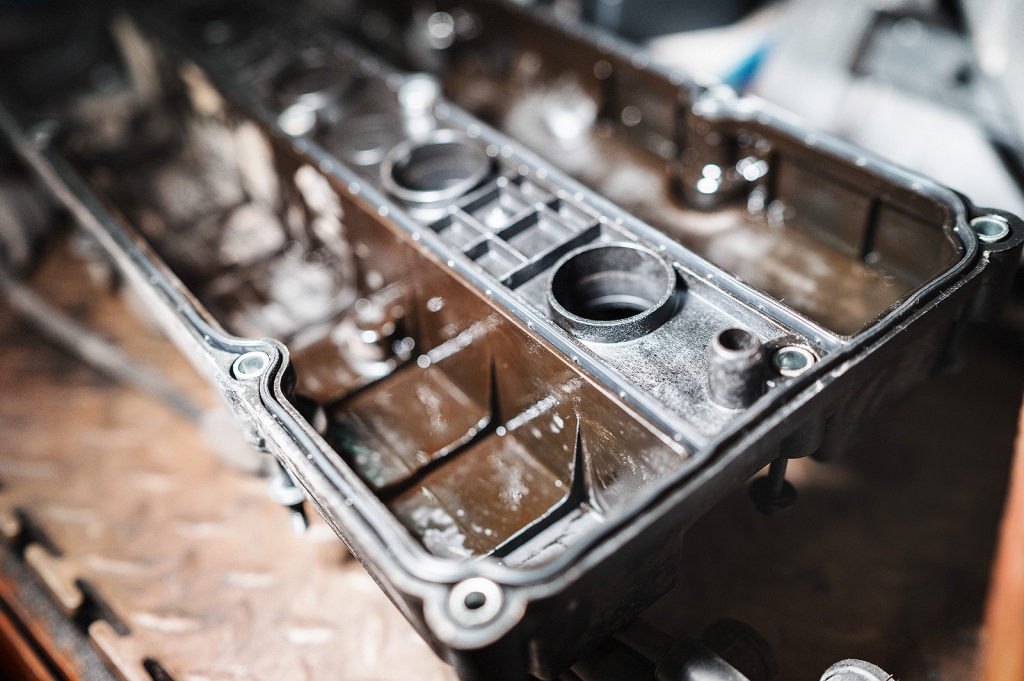
Next, remove the ignition coils and valve cover.

The picture under the hood is very pleasing, it is immediately clear that the oil was not only changed on time, but also chosen according to tolerance - no dirt, no deposits.
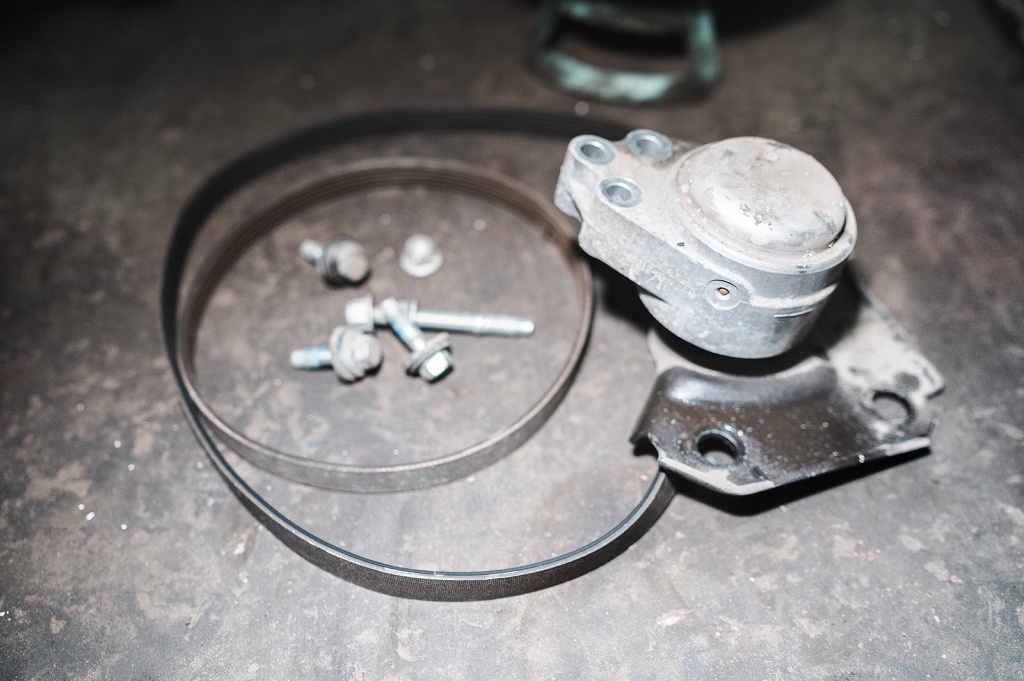
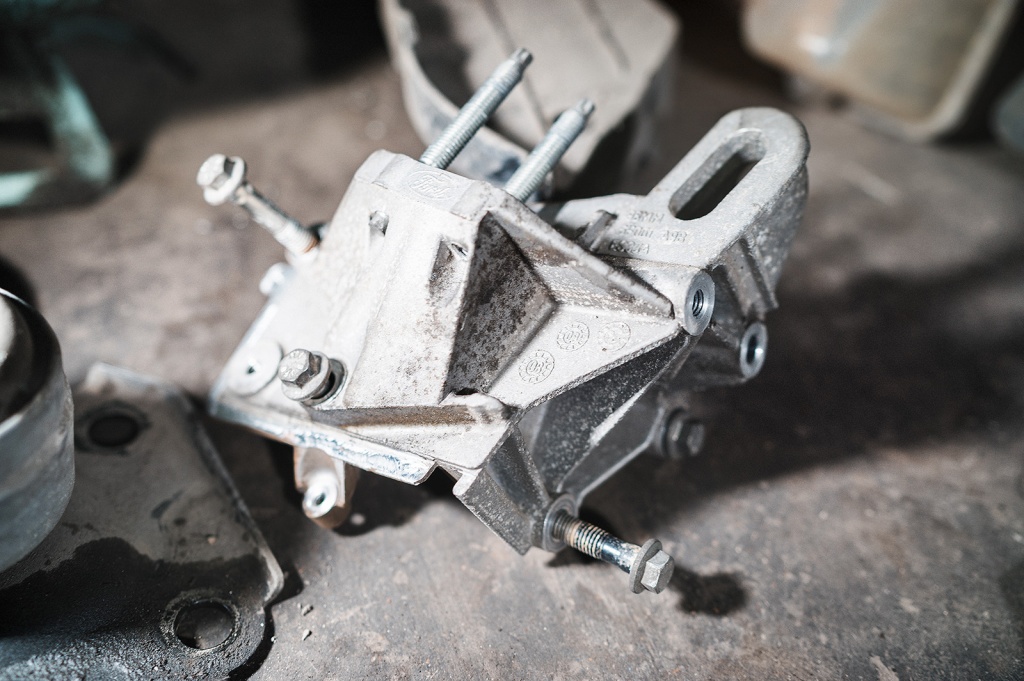
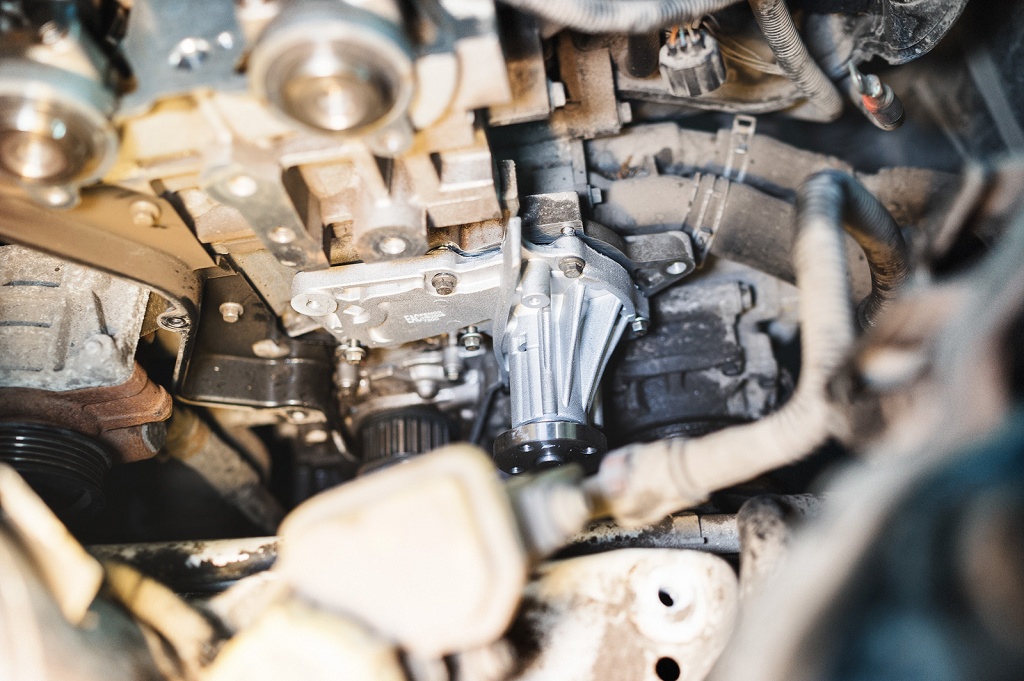
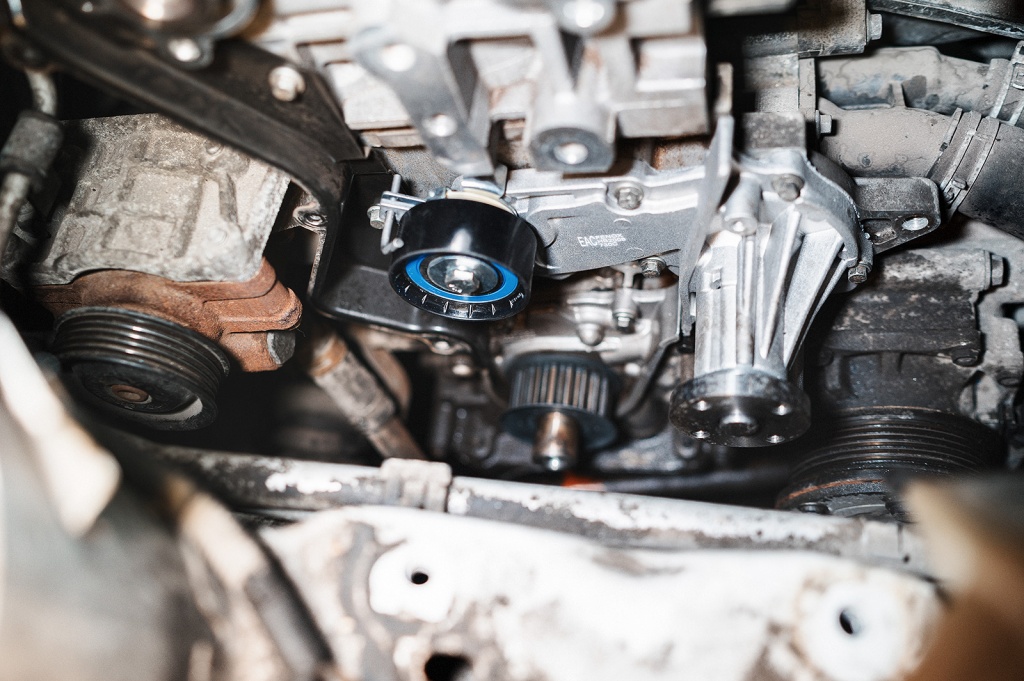
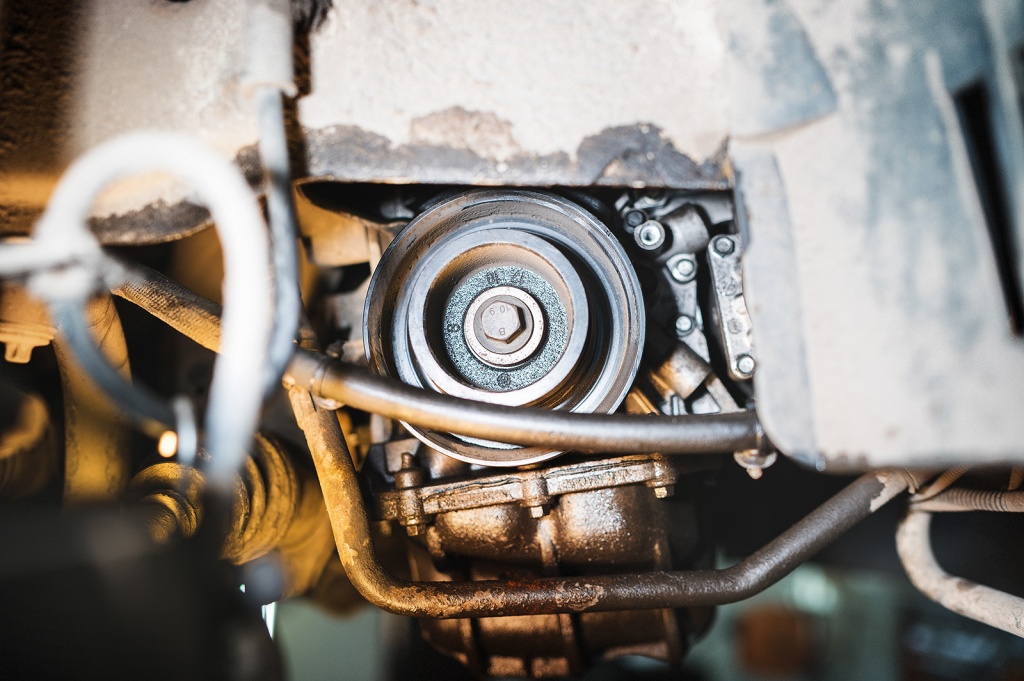
Next in line is the attachment belt and the right support, without removing which you cannot get to the Ford Fusion timing belt.
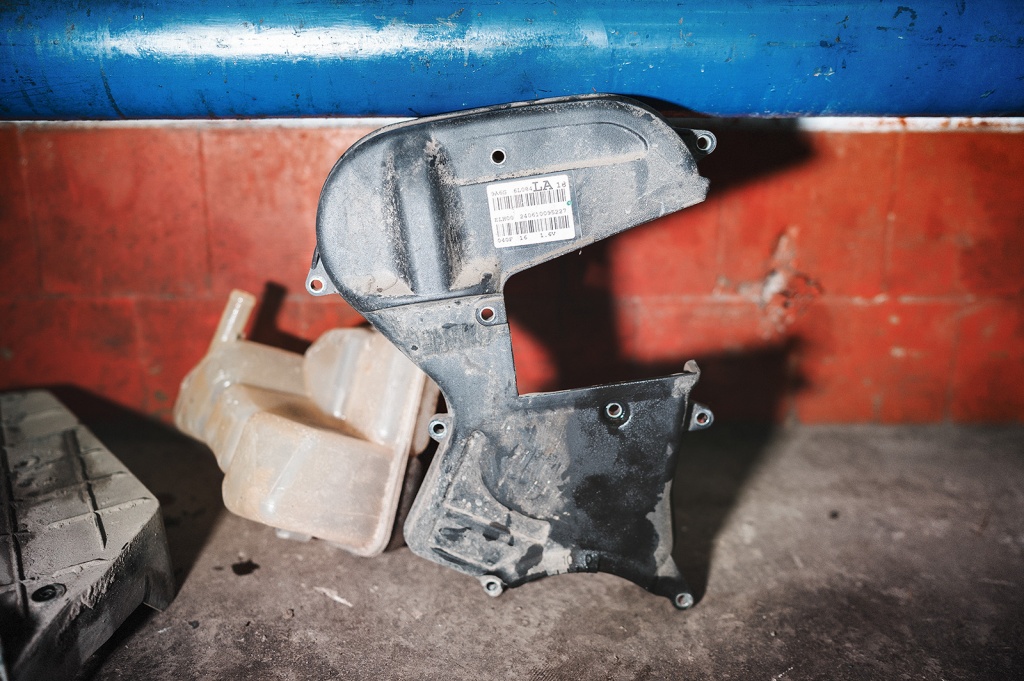
The obstacles have been removed, we are getting to the side plastic protection, it is also the timing belt cover. The main function of the design is protection from dirt, dust and technical fluids, yet several thousand revolutions per minute are no joke.
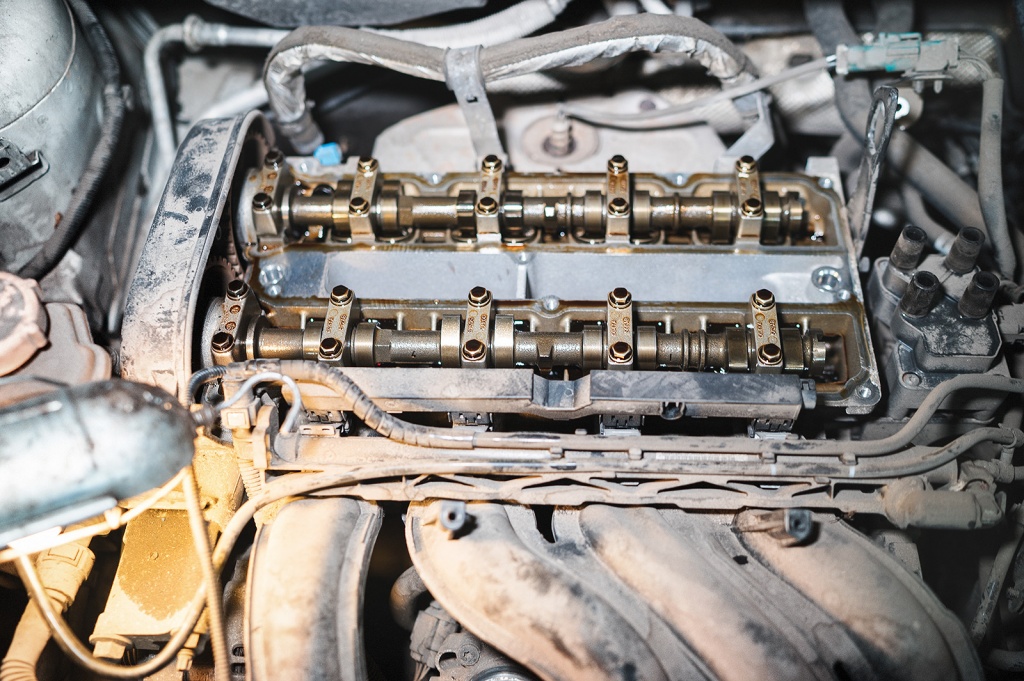
As you can see, the timing belt is still alive, albeit battered by life, even the markings have been preserved.
The bracket of the right support prevents the camshaft gears from being unscrewed, so we also unscrew it for now and put it aside.
We fix the camshafts with a special bar, which is inserted from the opposite side of the gears.
We repeat the procedure for the crankshaft with the only difference being that a special screw acts as a stopper.
Now you can safely change the Ford Fusion timing belt - the marks will not run away, the valves will not suffer. Let's start with the top of the gas distribution system.

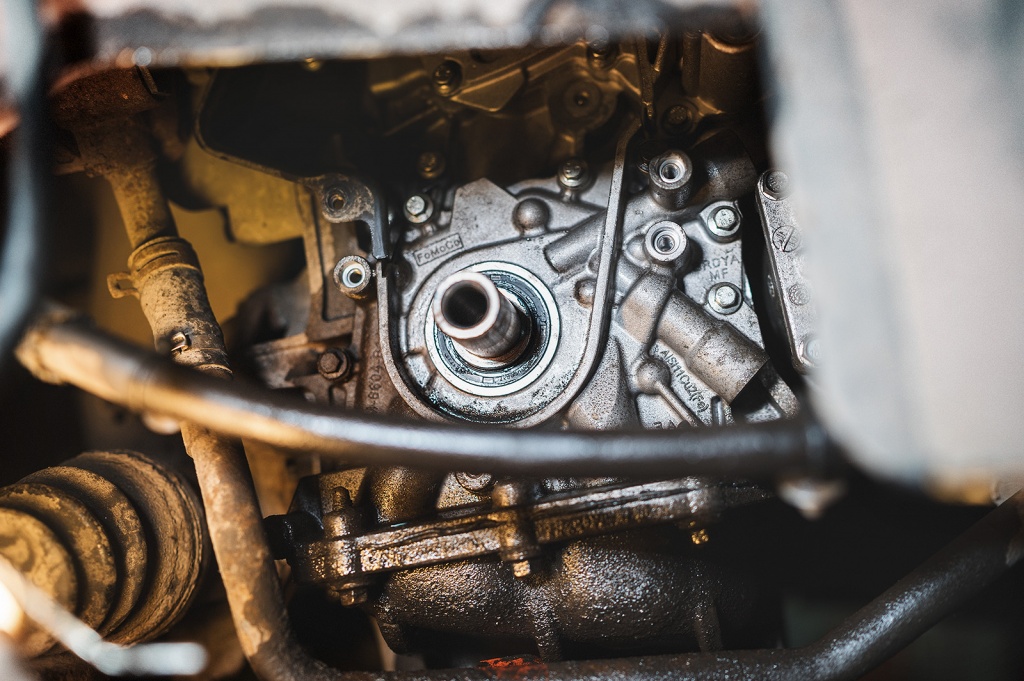
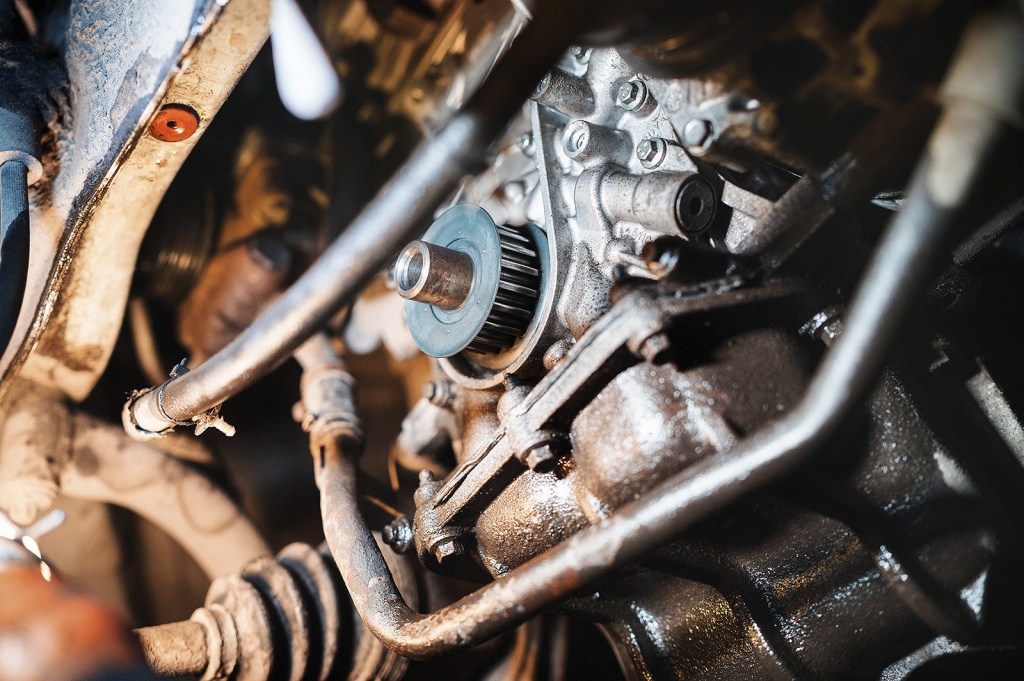
We remove the camshaft gears for under them.

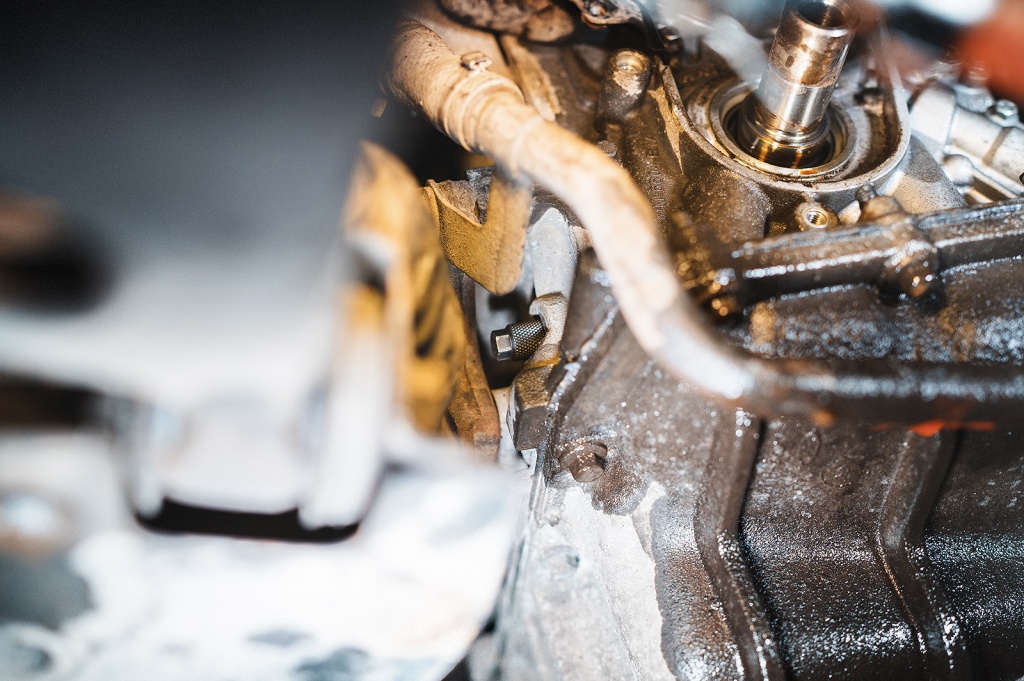
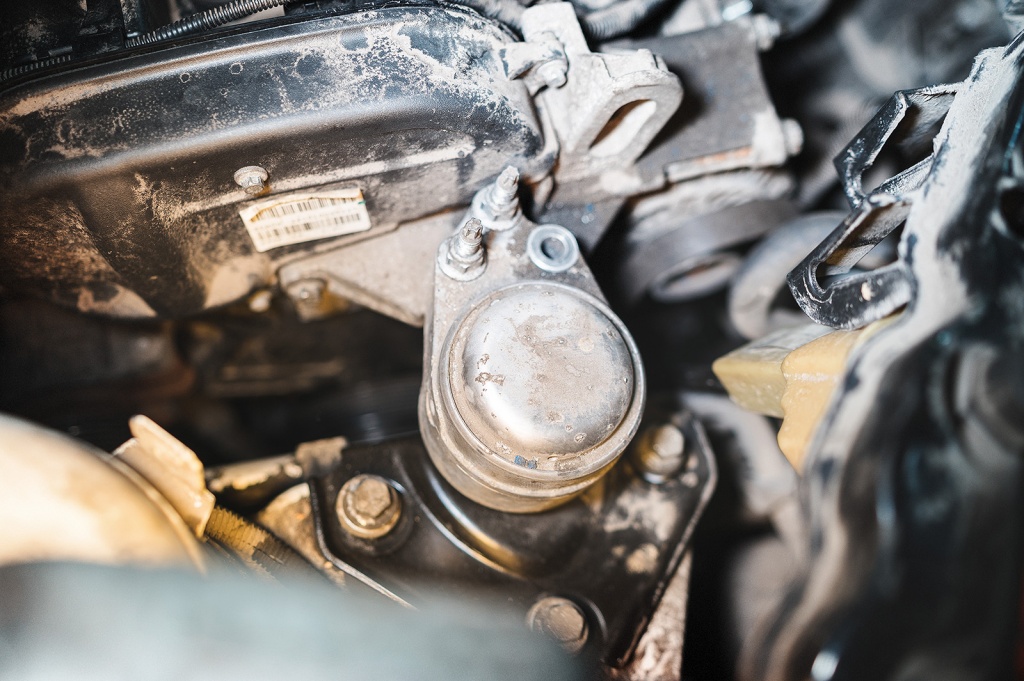
We substitute the container and unscrew the pump. No matter how much antifreeze is removed before this, a part will spill anyway. There are no direct indications for replacing the water pump, but it’s easier to change it right away since we’re here than to repeat the entire disassembly and assembly procedure later.

Set the pump aside. It seems like a trifle, but at the collection point for non-ferrous and ferrous metals it is well quoted.

We are waiting for the antifreeze to stop flowing - a good reason to drink a cup of coffee.

In general, the procedure for replacing a timing belt is not so much complicated as time-consuming: a bunch of bolts, attachments, a crankshaft pulley, oil seals, gaskets, belts and rollers, everything falls under distribution.

Here it is, the apogee of the work, the checkpoint, after which it remains to repeat the same steps, but in reverse order. Let's start with the pump. Gasket, of course, new, supplied in the kit.
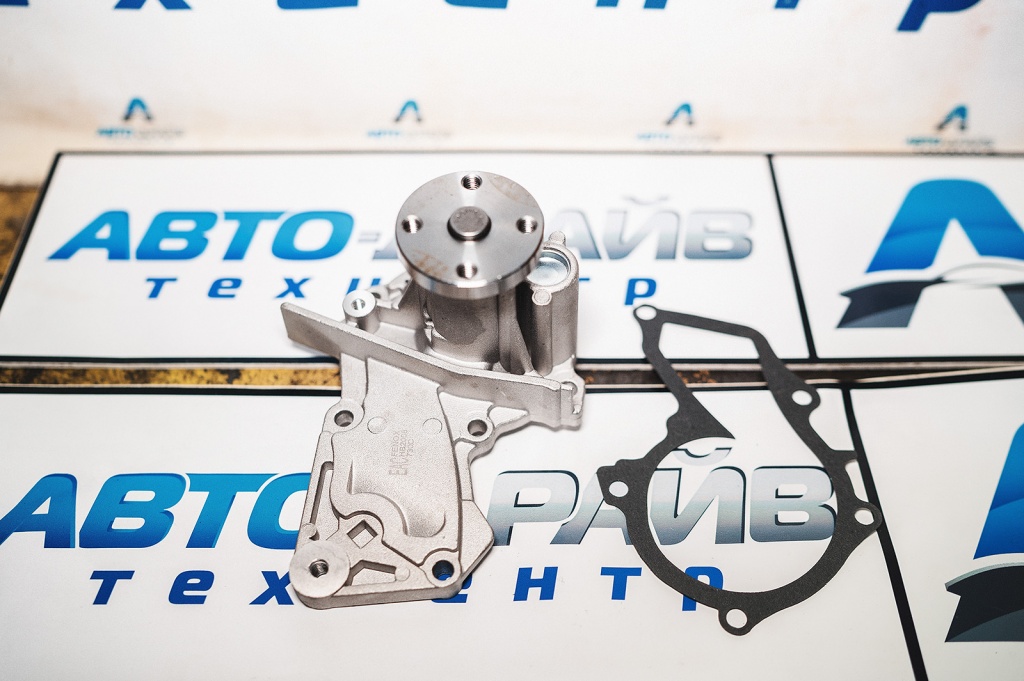
To begin with, we put on the pump, bait the bolts and check how the gasket has become, after which we arm ourselves with a torque wrench and carefully stretch the connections.
Next in line is a new crankshaft seal. The manufacturer recommends original spare parts, but many analogues work just as well, the main thing is to install it correctly.
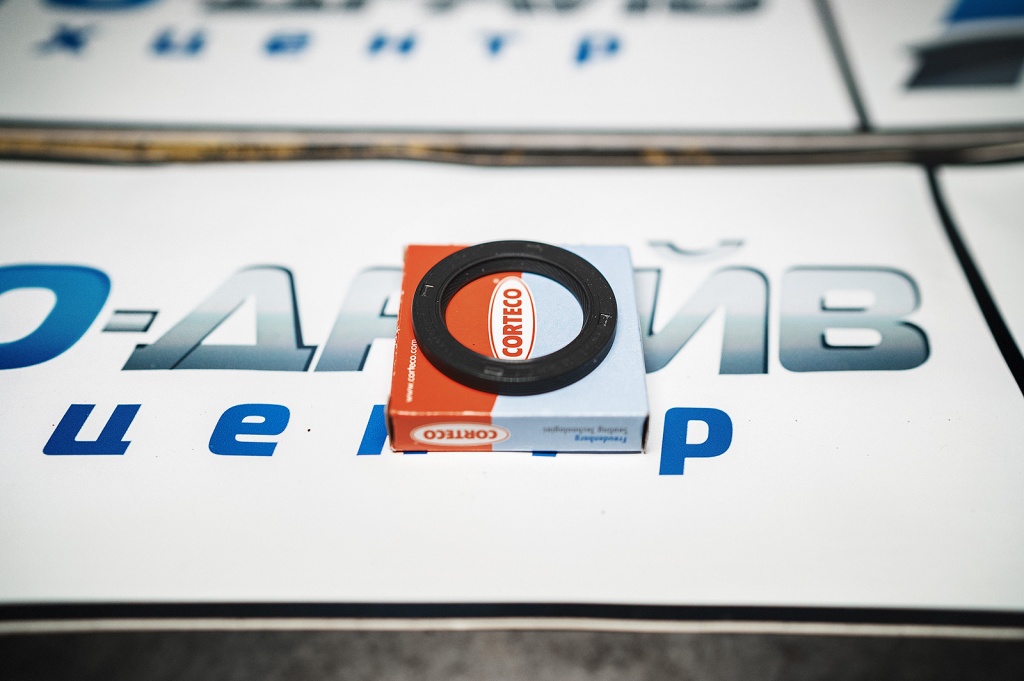
We carefully press in a new oil seal, check that it does not protrude beyond the surface of the mating plane.
We return the crankshaft gear to its place.
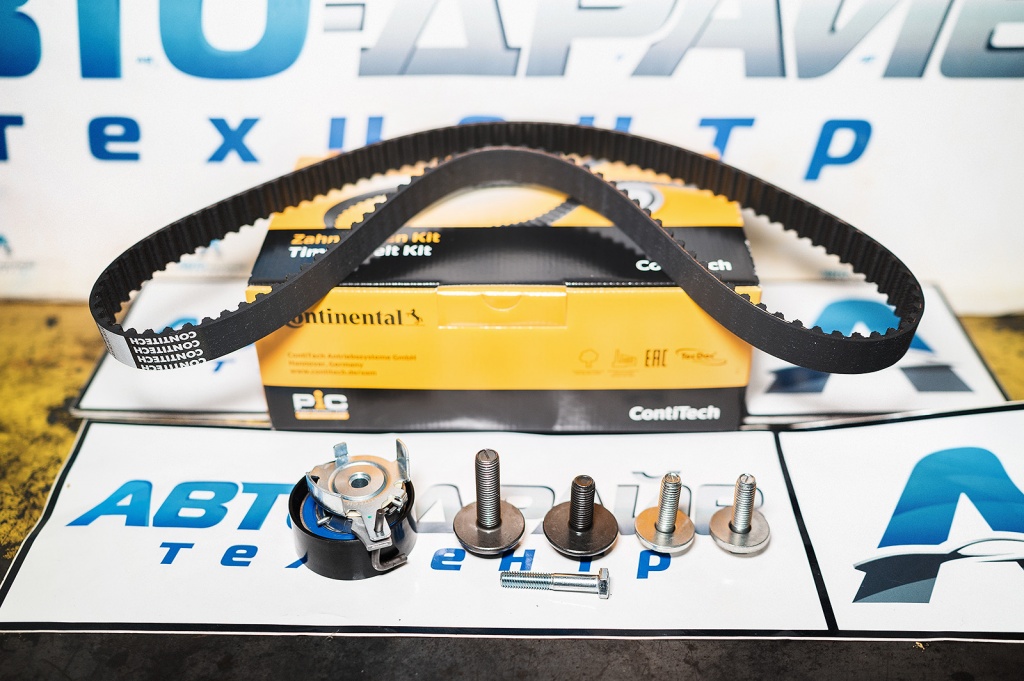
Let's move on to replacing the timing belt Ford Fusion. It is sold both individually and as sets. The latter option is not only cheaper, but it includes the tensioner and all the bolts. Yes, yes, the timing system bolts are disposable, you can’t save on such trifles.
First of all, we fasten the tensioner, but do not remove the retainer yet.
Armed with new camshaft seals. They are supplied with a special lubricant.
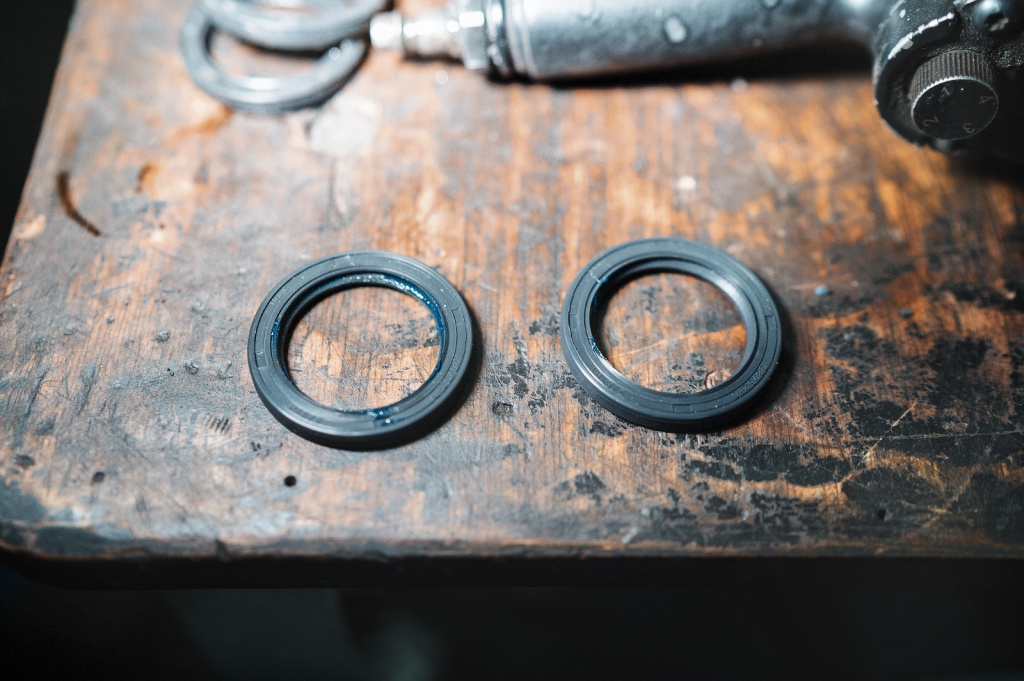
We arm ourselves with an installation spacer and carefully press in the seals. Now you don’t have to worry that oil from old seals will get on the timing belt and drastically reduce its service life.
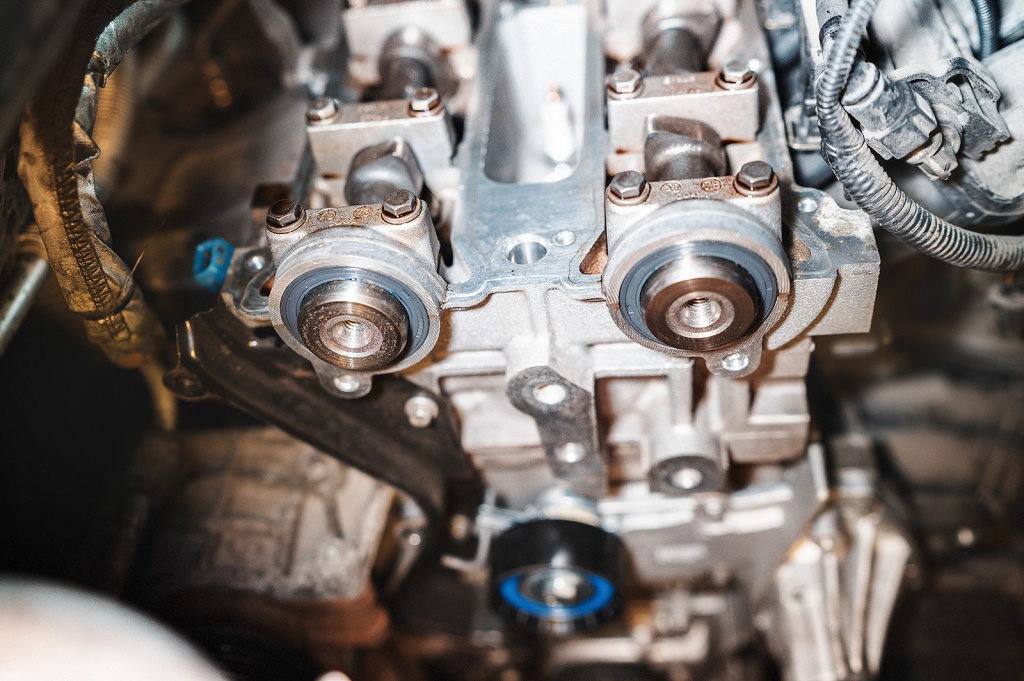
We install the Ford Fusion timing belt in place, after which we pull out the pin that blocks the tensioner, remove the camshaft and crankshaft clamps. We make several turns of the crankshaft and, just in case, check the coincidence of the marks. They have nowhere to run away, but to calm their conscience, you should not neglect the procedure. 
There are no questions to work, it remains to put the timing belt cover in place.

Screw back the crankshaft pulley. Be sure to use a new bolt.
The bottom is assembled, the only thing left is the tightness of the upper part.
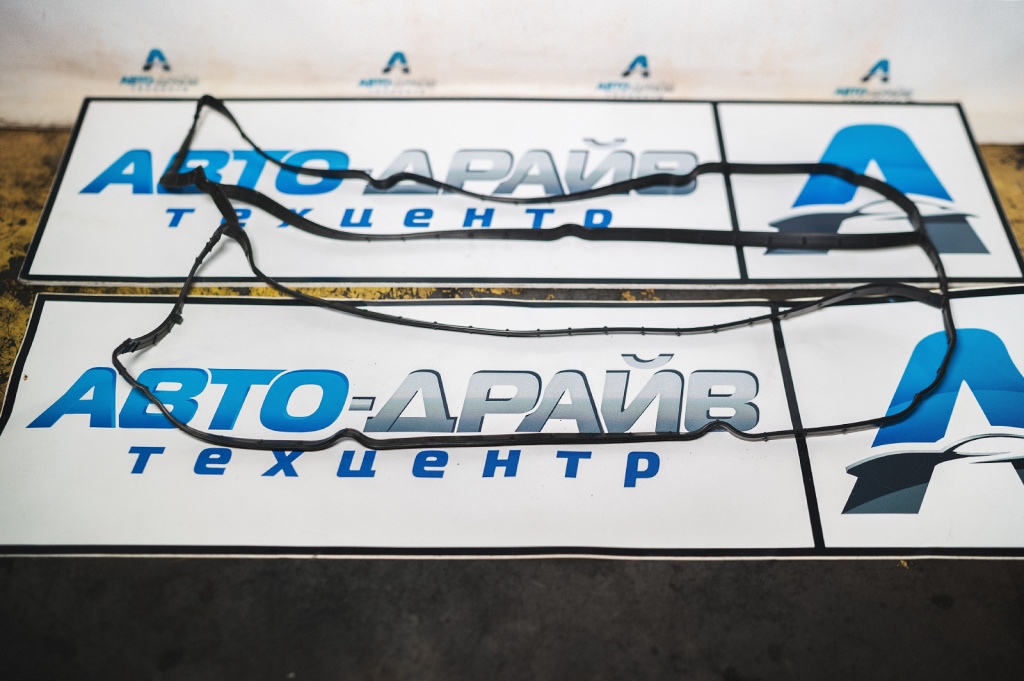
We wash the valve cover, clean the seats, put a new gasket and screw the cover.
It remains to return the attachment belts, support, start the engine and enjoy its smooth operation.
The whole procedure took 3 hours 30 minutes, however our time machine has reduced it to one minute. Enjoy!
Details:
Timing belt kit 1.6
Valve cover gasket 1.6
Crankshaft oil seal
Camshaft oil seal
Coolant pump 1.6
at the checkout:
Replacing the timing belt: 8000 rubles.
- spare parts and materials: 8650 rubles.
Characters:
Auto mechanic: Sinenok Ruslan
- master-receiver: Ponomarenko Artem
Video: Andrey Reznichenko