Thanks to modern technology, interior designers are becoming real wizards. In the blink of an eye, they will make any room stylish and original. Recently, more and more attention is paid to color design. The most popular are non-standard shades that can be obtained by mixing colors.
Process Basics
Manufacturers of paints and varnishes presented a fairly wide range on the market. But it is not always possible to choose what is ideal for the interior. Combining multiple shades will save time and money.
In many specialized stores, you can use the services of a specialist who will help you make the right color. But if you know the basic rules of how to mix dyes, you can do it at home with your own hands.
When mixing, you need to remember one important rule: you can not combine liquid products with a dry mixture. They have different indices, so the coloring composition may eventually curl up.
The most interesting part of the process is creating the desired shade. There are four primary colors:
- blue;
- red;
- green.
By mixing them, you can get any others. Here are illustrative examples:
- Brown is obtained by combining red and green. For a lighter shade, you can add some white.
- - the result of mixing yellow and red.
- If you need green, you need to combine yellow and blue paints.
- To get, you need to mix blue and red.
- Red and white will result in pink.
So you can mix ad infinitum.
Mixing acrylic materials
Designers love acrylic paints the most. They are very easy to work with, the finished coating has excellent water-repellent properties. Their use has several nuances:
- The work surface must be perfectly flat and smooth. To do this, it needs to be sanded.
- It is important that the paint does not dry out.
- To get an opaque color use undiluted paint. Conversely, for transparency, you can add a little water.
- To be able to slowly choose the right color, it is recommended to use. Thanks to him, the tool will not dry so quickly.
- To distribute the paint, use the edge of the brush.
- Mixing is best done with a clean instrument. In this case, the colors should be directed towards each other.
- To make a light tone, you need to add a white dye to the solution, and to get a dark one - black. It is worth remembering that the palette of dark colors is much wider than light ones.

Here are some examples of mixing acrylic-based colorants:
- Apricot color is obtained by mixing red, yellow, brown and white.
- The manufacturing recipe involves the combination of brown and white. If you need a bright beige, you can add a little yellow. For a light beige shade, you need more white.
- Gold is the result of mixing yellow and red.
- Ocher is yellow with brown. By the way, it is considered popular in the current season.
- can be done by mixing green dye with brown.
- Magenta requires three different colors: red, yellow, and blue.
Mixing oil paints
Oil-based paints are more fluid, which necessitates more thorough mixing of the compositions if mixing tones is performed. The specificity and properties of oil colors give the following advantages:
- the tone will be the most uniform, so the paint is perfect for decorating any surface;
- if desired, you can leave streaks in the paint, which will allow you to create unusual effects on a canvas or wall.

Oil stirring
Before work, it is important to evaluate whether it is possible to combine individual tones with each other, what will be the result. If you introduce a little glossy paint into a matte one, the result will be inexpressive. Adding a matte paint to a shiny one helps to make the latter a little more subdued.
brown tones
Red tones
- The basis for it is considered to be white. Red is added to it. The brighter the desired shade, the more red should be added.
- To get a rich chestnut, you need to mix red and black.
- Bright red-orange color - red and a little yellow. The more of the latter, the paler the result will be.
- You can give the dye a purple tint by mixing a few drops of bright blue and yellow colors and red pigment.
- To create, according to the recipe, you need to mix bright red + white + brown + blue. The more white, the pinker the shade.

Deep green is formed by combining yellow and blue tones. The saturation of the finished dye depends on the amount of each of them. To create shades, you need to add other colors to green:
- For need white.
- To get an olive color, you need green and a few drops of yellow.
- A shade of grass can be obtained by mixing green with blue. Yellow paint will help even out the color.
- The color of the needles is the result of mixing green with black and yellow.
- Gradually mixing green with white and yellow, you can make an emerald tone.

purple tones
Purple is made by mixing blue and red. You can also use blue and pink paints - the final color will be light, pastel. To darken the finished tone, artists use black paint, which is added in very small portions. Here are the nuances for creating shades of purple:
- for light purple, you can dilute the finished color with white in the right ratio;
- for magenta, you need to enter more red paint than blue.
Orange color
When creating a classic orange, they combine one part of yellow and red paint. But for many types of paint, you have to take more yellow, otherwise the color will turn out to be too dark. Here are the main shades of orange and how to get them:
- for light orange, take pink and yellow, you can also add a little white paint;
- coral requires dark orange, pink, white in equal proportions;
- peach needs colors such as orange, yellow, pink, white;
- for red, you need to take dark orange and a little brown.
Important Rule
Many people ask the question: is it possible to mix paints and varnishes from different manufacturers? It is desirable that the dyes to be mixed be made by the same company. It's even better if they are from the same batch. Mixing dyes from different companies is not recommended. Often they have different properties, such as density, brightness, etc. Because of this, the finished coating may curl.
If there is a desire to take a chance, you can combine a little bit of one and the other paint and apply the resulting solution to the surface. If it thickens or clumps, the experiment is not a success.
Computer help
You can mix several colors correctly using special computer programs. They help to see the final result and determine in percentage terms how much of one or another tone needs to be added. Such programs will help you figure out what shade can be obtained from the funds that are available. They consist of several elements:
- A button that removes tones from a set.
- Color names.
- Lines of input or output to or from a calculation.
- samples.
- A button that introduces colors into the set.
- Result windows.
- New selection window and list.
- The composition of the finished dye as a percentage.
Mixing several different colors is a fairly common technique among designers. Unusual shades will help to advantageously decorate the interior, make it original or even unique. You can mix dyes even at home. There are many recipes for creating a particular shade. For example, to get beige, you need to combine white and brown, and for pink, white and red.
It is recommended to always have a thinner on hand to prevent the paint from drying too quickly. Do not mix products from different manufacturers, because the result will be a poor-quality coating. To find out the final result of mixing, you can use a special computer program.
Mixing colors is one of the most difficult procedures that a person who decides to make repairs on his own may face. The fact is that it is very important to know which colors to mix to create a certain tone. It should be noted right away that it is better to purchase white paint and tint it in the store using a special machine, so the tone will be uniform. If you decide to do everything yourself, then you can find out how to mix colors correctly.
These materials are universal, they are used for many purposes: with their help, you can simply paint the walls, paint stained-glass windows, apply a picture on the wall and ceiling. In general, the scope of their use is limited to fantasy. The compositions are easy to use, well kept on the surface. But if you decide to paint a multi-component image on the wall, then buying paint in all the necessary colors will be too expensive, and after completion of the work there will be a large amount of unnecessary material. In this case, it is better to buy a base series, and to create certain shades, mix acrylic paints.
 Mixing basic paint colors makes it possible to get many different shades, while you can save a lot on your purchase.
 Basic color range
Everyone has known since school: when you combine yellow and red, you get orange, but if you add blue to the same yellow, you get green. It is on this principle that the table for mixing acrylic paints is built. According to her, it is enough to purchase only the main colors:
- white;
- black;
- red;
- brown;
- blue;
- yellow;
- pink.
You can simply mix acrylic paints in these tones to get most of the existing shades.
Table Blending Basics
To properly mix materials, you can not do without a table. At first glance, working with it is easy: to get the desired result, just find the color and see what components are required. But the proportions are not indicated in the color mixing table, so it is necessary to gradually add tinting material to the main paint and apply the mixture to some unnecessary product: a sheet of plywood, drywall, and so on. Then you need to wait until the material dries. If the color matches the required, you can start working on the main surface.

Tinting technique
Now about how to get colors. By mixing acrylic materials, two main tones can be achieved: light and dark. Basic tones: earthy, green, orange, purple. To create a color, it is recommended to follow certain rules:
- Light. In this case, titanium white is the main material, to which one or two tinting compositions are added. The less additional paintwork is used, the lighter the tone will come out. So you can make most shades of a light palette.
- Dark. To form shades of this type, the opposite should be done. Before mixing colors, it is necessary to prepare the base tone, black dye is gradually introduced into the base. When working with black paint, you need to be careful, because it can make the color not dark, but dirty.
- Green. This shade is not in the main palette, so you will need to mix yellow and blue. The exact ratio can only be known empirically.
- Violet. This is a cool color that is obtained by mixing blue with pink or red. In some cases, you will also need to add black to darken the material.
- Orange. To create this color, you need to mix red and yellow. For a more saturated orange, it is recommended to add more red and vice versa. If you want to create a soft color, for example, coral, then you need to lighten the material with white. Can dark colors be added? Yes, you can, but as a result of mixing paints, a dirty tone may result.
- Earthy. Brown is the main color here. By adding various shades to it, they get a color from beige to dark wood.

Palette Rules
To get started, you will need a basic set of paints, brushes, a container of water and a palette (you can take any surface, including school supplies for drawing).
It is recommended to place white in the center, as they are used in creating most shades. Dyes of the main color range are placed in the recesses around (if any). You need to mix carefully, gradually adding tinting material and constantly checking the result. After mixing the colors, the brush should be rinsed in a container of water.
On a note! It is quite easy to work with acrylic resin materials using a table and a palette. The main thing is to practice more, each time the result will get better.
Oil paints
If you compare this material with watercolor or acrylic, then the oil is more fluid. Because of this, you need to mix the compositions of different colors very carefully. On the one hand, this is a disadvantage, but on the other hand, this feature allows you to get the following effects:
- Subject to thorough mixing, a uniform tone will be obtained. Such material is perfect for both full coloring of surfaces, and for partial decoration.
- If mixed partially, then multi-tone streaks will appear on the coating.

Mixing
Now about how to mix oil paints. A table is also used to mix oil-based paint colors. It indicates the colors obtained by combining various tinting components. In addition, here you can find such an indicator as a combination of brilliance. If you add a little gloss to a matte base, then there will be practically no result, and if you do the opposite, then the shine will be slightly muted.
Mixing methods:
- Mechanical. In this case, we are talking about mixing two or more materials of different colors in one container. Color saturation is controlled by the number of compositions of bright shades. The desired color is created even before the wall or ceiling is processed.
- Color overlay. Gradual application of several strokes on top of each other.
- Optic. This is the most complex method, which is available only to specialists. It involves mixing glossy and matte bases while applying paint to the surface. You can mix the colors of paints only on the treated surface, otherwise you will get a more even tone.
Peculiarities
The first method fully corresponds to the data in the table. If we are talking about color overlay, then the result is unpredictable. One of the simplest options for optical illusions is glazing: a dark tone is applied to the surface, after it dries, a slightly lighter paint is applied, and then completely light. As a result, each color will be visible through the upper layers.
Thus, there is no definite scheme. To find out which colors to mix, it is not enough just to take and look at the table, it is important to constantly practice and not be afraid of experiments. So you can create a new effect that will make the interior unique. It is also important to remember that a mixed shade is very difficult to repeat, so you should remember the proportions.
Now the question of how to properly mix paints does not seem so difficult.
Have you noticed how many types of paints exist today? Abundance is whole, the eyes run straight, especially for a novice artist. If an experienced artist goes to the store already for the paint "acquired" over the years, then the situation is completely different with those who have not yet decided on it.
But fortunately, a wide range of colors allows you to choose "your" material. But, only by experimenting with each of the types of paints for, which we will talk about later, you can understand at some specific moment that you have found the "same" material or materials.
Watercolor

You can start with watercolor, which belongs to the group of glue paints. With watercolors in cuvettes and tubes, we have known since childhood. Its main advantage is transparency, for which many artists fell in love with watercolor, because paintings painted in watercolor look light and bright.
The paint is easily taken on a brush and also easily falls on paper, however, the watercolor painting technique is one of the most difficult, as the paint is not obedient.
Renaissance masters used watercolors to develop sketches for fresco and easel works.
A skilled artist can easily write sketches and lyrical miniatures with such paint, conveying the unique states of nature. Also, the watercolor technique allows you to paint landscapes, still lifes and even portraits. Until our time, the works of Lessuer, Raphael, Van Ostade and Rubens, painted with this paint, have survived.
Acrylic

Polymer substance as a binder for acrylic paint, protects the work with its dense and durable film. Modern, simple, reliable and at the same time beautiful acrylic paint is applied to any surface even without prior preparation. Acrylic colors and shades are quite diverse.
There are both liquid and thick paints. The former are used to paint pictures with a smooth surface. With the help of thick acrylic, works with an interesting texture can be obtained. Dries quickly, does not wash off and does not fade in the sun.
Acrylic allows you to work without cracking the film on moving bases. The color does not change when dried.
Tempera

But tempera, unlike acrylic, can lose color over time. Do not wash it off with water after drying. An excellent artist's tool for painting and decorative design work. With a wealth of experience, you can use any application technique and paint both on paper and on canvas primed with emulsion primer.
Protein or yolk is used as a binder. Tempera paints have the advantage of not only drying quickly, but also durability.
Feel the complete freedom in creativity with tempera paints, as the application of thick layers does not affect the strength. In addition, the base can be not only made of cardboard, plywood, paper or canvas, it can also be concrete, plaster, glass or synthetic linoleum.
Oil

Oil is the main material in painting, because since the 6th century, master artists have used only it. And how many masterpieces are painted with oil paints!
You can work with oil calmly and for a long time, but most importantly, it is oil that allows you to create the most realistic and lively paintings with amazing brightness.
Everything here is to the taste of an amateur, because a layer of oil paint can be transparent and dense, thin and thick, light and dark, matte or shiny.
The binder is linseed and other natural natural oils, but mostly linseed oil.
Oil paints have good light fastness.
The consistency is thick, the color intensity is high. Paints are easy to mix with each other.
The ideal medium for oil painting is of course canvas, especially linen, but cardboard, paper, and all wood surfaces can also be used. Although I personally do not like cardboard - it takes all the moisture out of the paint, it becomes dry, which can cause lumps.
Creating oil paintings definitely requires certain skills when working with technology, so you can’t do without training and gaining experience.
Gouache
This is truly amazing, simple and at the same time complex material. Gouache is painted by both children and great artists. Remember the works of Picasso and Rubens? Here are some of them were painted in gouache.
Such paint can easily fix any defect, this is where its lightness lies, but the difficulty is to achieve the desired color and even tone is often a difficult task. Again, you need to experiment.
This paint is bright and water soluble. White, which is part of its composition, makes it slightly pale, but velvety.
Compared to oil works, gouache is stored less. But gouache is absolutely harmless, which cannot be said about the composition in oil paint.
Gouache paints are similar to watercolors. They only differ in their color opacity. But you can’t use watercolor technique in this way.
Sanguine and sepia

People have been painting with these natural minerals since prehistoric times. In the form of crayons, they can depict nudity, since its tone just matches the color of the human body.
Sepia and sanguine are applied quite easily, and shaded with the same ease. Such materials can be combined with charcoal, because it practically does not differ in the principle of working with sanguine and sepia, but by experimenting, you can get inspiring and interesting works.
Coal

The most popular and ancient material. It conveys the state and mood of the artist to the object with absolute accuracy. It also blends easily and rubs like sanguine. By using charcoal, you can increase the effectiveness of the painting due to its deep black color, which is good for painting or drawing lines along parts of the face.
It is important to learn how to handle it carefully, as it is fragile and easy to get dirty. But besides this, you will, of course, need knowledge about techniques with this material.
ink
With ink (soot) you can make thin (pen) and wide strokes with a brush. You can't remove the ink! It can be intimidating for beginners, but it's actually a plus. After all, having got the hang of it, you can make your work much more expressive.
Pastel

Unusual kind of painting material. But with the help of pastels, you can give the picture magic and fabulousness using the appropriate technique. In fact, these are the same crayons or pencils, and the artist does not need to mix colors on the palette.
You can be convinced of how beautiful and varied pastel technique is by looking at the most excellent works of Levitan, Dega or Sirov.
The ease of working with this material is also striking: you can mix shades to get the desired tone directly on paper, using the same shading. Layers can overlap, and any defects can be easily masked.
Mastering the technique of working with pastel is quite simple and interesting.
Conclusion
Finally, we can say about two more colors used in painting - ceramics and stained glass.
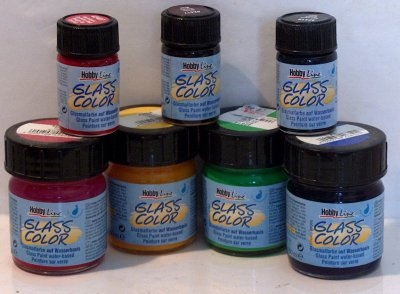
Stained glass. The name speaks for itself: the paint allows you to create the effect of stained glass or real colored glass. It can be solvent or water based. Can be used on glass and other smooth surfaces.
Paints for ceramics characterized by their non-fluidity. This opaque paint can achieve the effect of glazed ceramics, using techniques for painting on "hot" or "cold".
11.12.2015
We are all used to the fact that artists paint with brushes, occasionally changing them to pencils or colored crayons. But in general, the arsenal of painters' tools is much wider, and these, sometimes very unusual devices, will be discussed.
Palette knife(with the accent on the last syllable) is a special tool used for technical (mixing paints, cleaning the palette) and pictorial works (applying thick paint on canvas or using instead of a brush). The main materials for their manufacture are steel and plastic. Palette knives in design resemble a trowel (trowel).
Putty knife- this tool, familiar to everyone, is widely used in oil painting, however, mainly in auxiliary work: for cleaning the palette, mixing paints or applying a primer.

Palette- a small thin and light board of oval or quadrangular shape, used for mixing paints during work. Along with brushes, it is one of the symbols of painting. In oil painting, a wooden palette is used; for work in other techniques, it can be made of enameled metal, earthenware or porcelain.
rapidograph or capillary pen- a tool for making ink drawings. Allows you to draw a line of the desired thickness, while not leaving streaks and blots.

Maulstick- an original device that allows you to hold the working hand while working on the small details of the picture. It is a stick, usually wooden, up to one meter long, at one end of which a ball is fixed. With this end, the artist leans on the canvas, and with his free hand he holds the other end of the bullpen. A hand with a brush at this time lies on it, as if on a shelf.
Easel- a stand, most often wooden (for example, I.I. Shishkin used exclusively an iron easel), on which a picture or drawing is fixed during work. The most common type is tripod easels, much less used are easels consisting of upright posts that are mounted on a horizontal base. Initially, the easel was called the basis of oil paintings made on board or copper shields. This practice survived well into the 17th century, especially among Dutch artists and their imitators.

Paint sprayer or airbrush- a pneumatic tool, sometimes called a spray gun for applying liquid material (paint or ink) by pneumatic spraying. This is one of the most modern tools of the artist, which has found wide application in painting.
Nag or nag- under this name, the artists hid an eraser well known to any person. However, a nag eraser is different from a schoolboy's eraser. It is an easily crumbling pasty mass with high absorbent properties. And in addition to the usual function of removing unnecessary elements (correction), the nag is used to create halftone and highlight effects in graphic works, pastels and charcoal drawings.

![]()

Palette
(from French palette) - a small thin board of rectangular, oval or other shape, on which the artist mixes paints. The palette for oil painting is made mainly of wood, and for watercolor and gouache, it is made of white plastic. Such a palette sometimes has recesses for paints. A white saucer, a tile or a sheet of paper is sometimes used as a palette. Each artist prefers a certain, most convenient arrangement of colors on the palette, a certain number of colors. Therefore, the list of colors used by the artist is also called a palette, meaning a special color system characteristic of a particular work or the artist's work as a whole. In this sense, the term "palette" is close to the concept of color. For example, the palette of the French artist P. Picasso in the "blue period" of his work consisted mainly of blue, blue and green colors, and in the subsequent "pink period" - of warm pink-golden hues.