To prepare a white sponge cake, you need to beat the eggs until they increase in volume, then, gradually adding sugar, beat for another 7 minutes. Add flour to the resulting mass in a thin stream, stirring gently from bottom to top. Pour the resulting dough into a springform pan (24 cm) lined with baking paper. Spread the dough evenly over the pan, turning the pan clockwise several times. Place in the oven for 25-30 minutes, preheated to 180 degrees. Cool the finished white sponge cake. It will be approximately 1.5 cm in height.
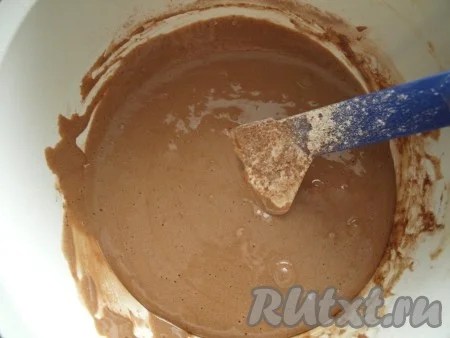
To prepare a chocolate sponge cake, you need to sift together flour, cocoa, baking powder and mix with sugar. Beat the eggs, add to the dry ingredients, mix thoroughly. Pour the dough into a mold lined with baking paper and turn the mold clockwise several times. Bake the chocolate biscuit for 20-30 minutes in the oven at 180 degrees. Cool the finished biscuit. It will be approximately 3.5 cm in height.
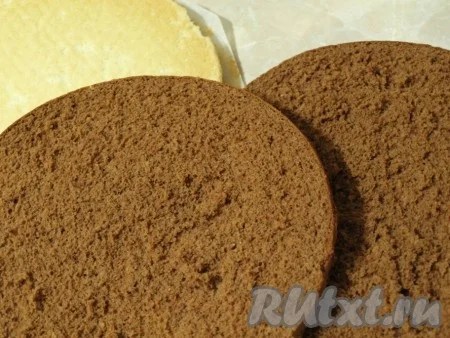
 Cut the cooled chocolate sponge cake into 2 layers. Leave the white sponge cake as is, no need to cut it.
 We will get 2 chocolate cakes and 1 white.
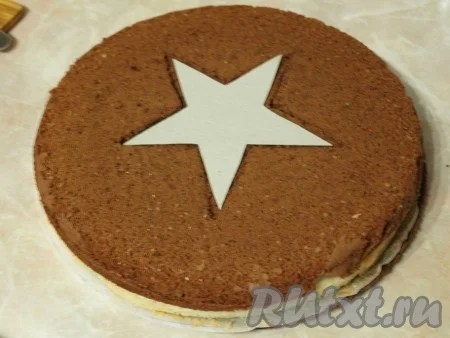
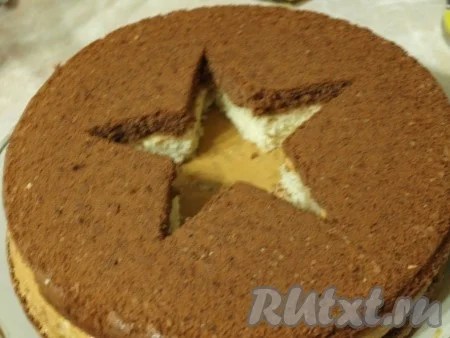
Place one chocolate cake on the white cake layer and use a template to cut out a star in the middle of the two cake layers. I made a cake from white and chocolate stars cut out from the cake layers, coating the stars with cream.
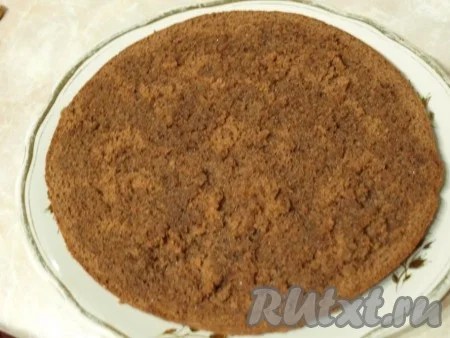
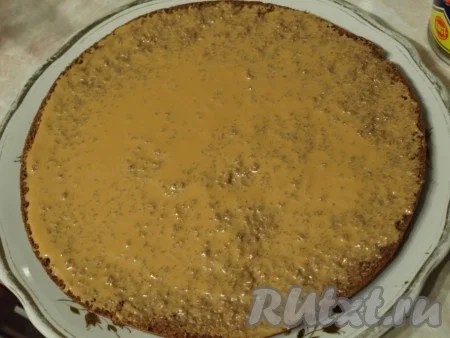
 To prepare the impregnation in proportions of 50 to 50, mix strained strawberry jam and water, add a little cognac and stir (you get 250 ml of impregnation). Place the chocolate cake without the star on a plate and soak it.
To prepare the cream, the products must be taken at room temperature, then the cream will be homogeneous.
Mix boiled and regular condensed milk, butter and cognac in a blender until smooth. The cream will be pleasant and gentle.

Spread the soaked chocolate cake with cream.
Place the white cake on the chocolate cake, soak it and brush with cream.

To prepare the glaze, mix cocoa and sugar, pour in the cream and bring to a boil over low heat, stirring constantly (but do not boil). Cool the glaze and cover the cake with it.
 Chop walnuts and decorate the sides of the cake.

Prepare the jelly as indicated on the package, pour into any mold. When the jelly has hardened, cut it into pieces and fill the star on the cake. Decorate the “February 23rd” birthday cake with cocktail cherries and pastry balls, let it soak and serve.
 Bon appetit!!!
It is believed that sweets are not the most “masculine” food. However, it is unlikely that anyone will refuse a piece of homemade cake on this occasion, because this is a holiday when many women try to demonstrate their culinary abilities and please their loved ones, colleagues and close relatives. What recipes can you surprise them with?
Most representatives of the stronger sex are quite conservative in their choice of dishes, including desserts (although there are exceptions). But if you need to bake a cake for a large company, then it’s better not to risk it and make something traditional - “Napoleon” or sponge cake.
To prepare sponge cakes, from which you can later assemble a cake of any shape, you will need:
- 3 large eggs,
- flour and sugar - 1 cup each,
- 1 tsp vanilla powder.
First you need to cool all the ingredients and the dishes where they will be mixed. Then separate the whites from the yolks, put the whites in the refrigerator, and grind the yolks with half the sugar and vanilla powder. Then beat the whites until foamy, gradually adding the second half of the sugar. Combine the whites and yolks, mixing them from top to bottom. Sift the flour three times and only then add it to the dough. Mix everything in one direction.
- To get a fluffy sponge cake, it must be baked immediately, so the oven must be heated to 180°C. The form with the dough is placed in it for 25-30 minutes, during which the oven cannot be opened. The finished cake can be divided into 3 or 4 flatter ones and coated with cream.
- First, the cakes must be soaked, otherwise they will be dry. Impregnation options: jam diluted with vodka; liquor; cognac (necessarily with water); coffee with sugar and cherry syrup, etc.
- The brighter the taste of the impregnation, the simpler the cream can be. For example, creamy cottage cheese: a pack of cottage cheese, a glass of heavy cream, ½ tbsp. Sahara. Everything is whipped until smooth.
- It is necessary to layer the cakes only when they have cooled completely. If the cake layers for February 23 need to be given some shape, then it is better to do this before layering.
A simple dough does not mean that the finished product will be boring. Delicious impregnation and original design will turn an ordinary sponge cake into a confectionery masterpiece.

Form
A round cake consisting of several layers is already a classic. But for the holiday I want to cook something unusual. How to cut a biscuit to make a tank, plane, shoulder strap, etc.?

Of course, simply folding the correctly cut biscuits is only half the battle. After all, they still need to be decorated. At home, cream, fruit or chocolate are usually used. But there are other ways to design

Decorations
To make the festive dessert really impress everyone present at the table, you can make a cake decoration for February 23rd from mastic. How to cook it yourself? There are several recipes for mastic, the simplest one is based on marshmallow. These are small candies that look like marshmallows or marshmallows. They can be of different colors, but for making mastic it is best to purchase white ones (about 100 g). What else is needed?
- 1 tsp butter,
- 6 tbsp. powdered sugar,
- 3 tbsp. potato starch,
- a pinch of citric acid.

Place marshmallows in a bowl, add a spoonful of water, oil and microwave for 20-30 seconds. The marshmallow will increase in size, you need to take it out, stir until smooth, adding a mixture of sugar and starch. When the mastic begins to thicken, it is spread on powdered sugar on a board and kneaded until it has the consistency of plasticine. Before using the mastic, let it sit for 40 minutes in the refrigerator in cling film. If you need to make this culinary “plasticine” of different colors, then add dye when kneading.
To cover the entire product with mastic, it is rolled out like regular dough, then carefully rolled onto a rolling pin and transferred to the prepared cake layers. Mastic figures are often used to decorate a cake for February 23rd, the recipe of which should not involve a large amount of sugar, because... the decorations will be very sweet.

Baking at home for a holiday is always a risk, because something can go wrong (the sponge cakes won’t rise, the cream will spread, etc.), so it’s better for beginners to start with something simple or take the help of more experienced chefs.
Every man loves sweets, especially when it comes to his holiday. And every woman is obliged to prepare dessert. But what it should be like - you won’t be able to disown gingerbread or store-bought cookies, and it’s much more pleasant for a woman to watch her beloved enjoy a mouth-watering creation.
Today I had the good fortune to make a cake with mastic - a delicacy that even the oldest boys dream of. This is both a holiday and interesting figures that you can gobble up without having time to blink. As a base, you will need a cake that can be combined with the components of the covering. Mastic varies in composition and preparation. Glossy ones should be applied to an oil layer of cream. It is present in cakes made from “bread” sponge cakes. Paintable sugar paste will go well with a “dry” cake. You can make sour cream from cookies and sugar, as well as waffle with condensed milk. There is no need to bake it. Ingredients you will need:
- Waffle cakes - as many as you want. The height and shape are determined by the pastry chef.
- Condensed milk - for two packs of cakes you will need 4 cans.
- Marshmallow marshmallows - 200 g.
- Powdered sugar - 500 g.
- Butter (concentrated lemon juice or water) - 1 tsp.
- Starch - 100-150 g.


Instead of lemon juice, it is better to buy medium-fat oil. Water - exclusively in cases where there is no time to run to the store for groceries. Mastic with oil does not dry out so quickly, stretches well, does not crack and takes a variety of cake shapes. Starch will be needed to sprinkle on future figurines and decorations.
Cake recipe with mastic for February 23
First, cook the condensed milk for 5 hours. We separate the cans from the stickers in advance. When the water boils, cook over low heat. It is better to do this in the evening, then in the morning the condensed milk will be at the desired temperature. It shouldn't cool down completely. If you prefer, add nuts or dry fruits. We add oil for a non-sweetening concentration of the ingredient.


Arrange the cakes by color (if they are not the same color). We apply a little condensed milk to the first cake layer, since later due to the weight it will become more saturated than necessary. We do the same with the remaining layers, excluding the top layer.


Set the cake aside for soaking and prepare the mastic. Separate the marshmallows by color - reserve the white ones for cooking. If it is twisted, you will have to tinker with a knife and calculate the approximate weight or measure it with a kitchen scale. Next, transfer to a separate heat-resistant container. Heat it in the microwave for 40 seconds or in a water bath. Add a spoonful of butter for elasticity. The mass will melt, increasing in volume, while maintaining the weight.


The resulting mass must be mixed with a spoon or silicone spatula. Sift the powder and add gradually. To obtain one color, add dye at this stage. If different shades are needed, add dye later.

When it becomes more difficult to mix, put the mastic on a table sprinkled with powder. Knead until it becomes elastic. Now you can divide into pieces and add gel dyes. First, let's prepare it for covering - let's create a marble effect. It is achieved “dry” without adding starch. It will be difficult and long to stretch it, but it will be worth it.

Wrap it in cellophane and let it “rest” for half an hour. If you plan to work with it tomorrow, put it in the refrigerator. Before use, warm it to room temperature or in the microwave. But make sure it doesn't melt, otherwise you can throw it away.

After mixing, mix the other parts of the mastic with the dye. This will allow you to achieve uniform coloring, and only then sprinkle with starch. By doing the opposite, you will achieve a marble effect, but the mastic will dry quickly. It will be more difficult to make the figures.


All decorations take 10-12 minutes. Roll out a sheet of red fondant and cut out a star. You can apply your own sketch. Next we make a white background for the inscriptions. We will write wishes or congratulations there. Yellow mastic will be needed to decorate the grenade.


Lastly, let's do the tight fitting. Roll out the layer 0.5 cm thick and transfer it to the cake. Use a pastry iron to straighten the “skirt”. From the leftovers from the edges we will make a grenade, tinting it with dark khaki green. Use a knife to cut the lines and leave to dry.


At this point we can summarize. The mastic takes several hours to dry, so don’t rush to put the cake in the refrigerator. Leave for a day or at least 8-10 hours before serving. The cakes will be completely soaked. Such products can be stored for up to 3 months in the refrigerator, so some of the decorations can then be dissolved in your morning coffee due to the marshmallow base. Bon appetit!
Cakes for a real men's holiday on February 23 are one of the main surprises for your loved one or spouse. As you know, all men have a true sweet tooth, so there will be nothing better if for this holiday you present him with a delicious juicy cake with chocolate and fruits.
You can decorate the cake for February 23rd in a more elegant way, for example, in the shape of a tank, using a simple mastic recipe and a little time. Decoration can also be made from nuts, candied fruits, marzipan - it all depends on your skills, abilities, imagination and available products.
The basic principle of preparing a men's birthday cake is that the product should be sweet, the design should not be made in a “feminine” style, the cake should be simple and without frills (like the Tank cake), but at the same time tasty and aromatic. Using our recipe, prepare a chocolate fruit cake for your loved one.
The cake is a sponge cake with some powder, which we can make in a slow cooker or oven; a layer of bananas goes well with rich sour cream. Our dish will be decorated with seasonal fruits and chocolate icing.
So, the complete list of ingredients for the biscuit dough recipe is as follows:
- 5 chicken eggs:
- 10 full tablespoons of sugar;
- 8 tablespoons of white wheat flour;
- 2 tablespoons cocoa powder;
- 10 grams of baking powder (standard small packet).
The recipe is successfully complemented by rich creamy sour cream, which will optimally soak the cakes, stick them together and give the finished cake incredible juiciness. For sour cream you will need the following ingredients:
- 900 grams of sour cream with a fat content of at least 25%, which still needs to be weighed on a sieve overnight;
- 4 tablespoons of powdered sugar.
We will soak the biscuit not with syrup as usual, but with milk. For the cakes prepared according to this recipe, we will need 250 milliliters of boiled milk, to which you can add a little powdered sugar or a tablespoon of strongly brewed instant coffee for flavor.
In addition, we will need 2 large bananas to layer the cake layers. You will also need fruit for decoration. Since Defender of the Fatherland Day is celebrated on the eve of spring, stores may have kiwis, tangerines, oranges, and apples. In addition, you can use freshly frozen cherries, strawberries or raspberries, after defrosting them and straining off the excess juice. As a last resort, it is permissible to use canned fruits and berries.
For the chocolate glaze, which we will use to decorate the top and sides of the cake, and which will serve as the basis for our fruit, we will need the following products:
- 200 grams of fat sour cream;
- two tablespoons of cocoa powder;
- 3 tablespoons of powdered sugar or regular sugar;
- vanilla package;
- a piece of butter weighing approximately 50 grams.
In this recipe you can add some nuts, colored coconut flakes, candied fruits, dried fruits and other decorations as you wish. Instead of chocolate glaze, you can use regular melted chocolate; for these purposes, it is better to use bitter black chocolate with a minimum sugar content, and melt it in a water bath or in the microwave. To prevent the resulting glaze from being too thick, you can add a couple of tablespoons of fresh cream or milk and mix thoroughly into the mixture.
Cooking method
Making such a simple fruit chocolate cake according to our recipe is not difficult, and if you use a slow cooker to prepare the sponge cake, the process will go even faster. So, first of all, we need to make the base for the cake - a chocolate sponge cake:

- Pre-chill the eggs for at least 5 hours in the refrigerator, then separate the whites, add a small pinch of salt and beat quickly at maximum speed with a mixer. As a result, you should have a lush, stable foam with peaks remaining.
- When the protein foam is sufficiently stable, gradually pour in one spoonful of sugar. Continue whisking vigorously.
- Traditionally, biscuits do not use baking powder; if the eggs are properly beaten and the dough is well mixed in accordance with the technology, there is no need to further loosen it, but it is better not to risk it and put 1 small packet of baking powder into the mixture.

- Separately, mix cocoa with sifted flour. Mash the yolks until white, add to the flour, and gradually add the protein foam into the same mixture.
- Try not to stir the biscuit dough too intensively; it is best to do this with a wide spatula rather than with a mixer. Wipe the multicooker bowl dry, grease the bottom and sides with a piece of butter and sprinkle a little with flour or fine white breadcrumbs. Transfer the dough there, set the “Baking” mode, baking time is 70 minutes. Since the standard mode lasts 60 minutes, after its completion you will need to set the “Baking” mode for another 10 minutes.
- Cool the finished sponge cake in the bowl to room temperature, then turn it over onto a plate and cut into 3 layers. Cool the cakes on a wire rack to prevent condensation from collecting on them.
Since baking in a slow cooker does not require any attention from the housewife, while the sponge cake is baking, you can make the cream. We will do it as follows:
- Strain off the sour cream, as mentioned above, since in this recipe we need a fairly thick lump. Beat the prepared sour cream a little with a mixer so that it is saturated with oxygen.
- Add a portion of sugar according to the recipe, mix thoroughly. The cream is ready.
- Additionally, you can flavor the mixture with vanilla or vanilla sugar, add a tablespoon of strong brewed coffee, a little cocoa powder or other flavoring.
Let's start assembling our cake:

- Place the cakes on the table, divide a glass of milk into three parts, pour it over the biscuit dough. Try to distribute the milk evenly so the cakes are moist but not soggy.
- Layer the inside of the cakes with sour cream, placing bananas cut into slices between them in one layer. Instead of bananas, you can use any other fruit that is not very juicy.
- Spread the finished cake on top and sides with the remaining sour cream and level it using a wide knife or spatula.
When it’s ready again, you need to prepare the glaze according to our recipe. You can, of course, melt a chocolate bar, but homemade icing is no worse, it costs less and is very easy to prepare:
- Place the sour cream in a thick-bottomed saucepan and bring to a boil.
- Mix powdered sugar or regular sugar with cocoa powder in a separate container, add little by little into boiling sour cream, stirring constantly. The heat should be very low, otherwise the sour cream will burn.
- Boil the mixture until thickened with constant stirring, turn off the heat, add a piece of butter and stir until it is completely dissolved in the glaze.
- Cool the glaze to about 40 degrees. It is not necessary to fill the entire surface of the cake, as is usually done, but only the sides. Place a spoonful of glaze on the side of the cake to create beautiful smudges. While the glaze has not hardened, place sliced kiwis, tangerines, oranges, bananas or other fruits along the side of the product.
- After this, sprinkle the fruit with powdered sugar.
- You can put some of the glaze into a small pastry bag and pipe the number “23” in the center of the cake on the white creamy surface.
If you have time and some fondant skills, you can make a tank-shaped cake for your husband. This is especially true if the man served in tank forces and is directly related to the tank. A product in the shape of a tank can be decorated with mastic, cream, or marzipan. To do this, you will need to bake a large biscuit and make a tank shape out of it, cover it with mastic, and separately make the tank parts - the tracks, the barrel. Decorating a cake with cream is a little easier - you will need to paint the cream in the appropriate colors and squeeze it out using a pastry bag onto the prepared cake.
Cake decoration options


For the coat of arms you can use ours.
In any case, a cake for a man or boy on Defender of the Fatherland Day should be tasty and juicy. Therefore, it is important to try, buy fresh, proven products, and put a little soul into preparing a sweet present.
We are making a cake for February 23rd. Today I will show you how to make a cool cake for February 23rd with your own hands. Girl climbers gave this cake to their bouldering instructors. But, naturally, the inscription may be different, and instead of a climbing shoe there may be a heart or a military tag with a declaration of love. Today I will make a chocolate cake with a very tasty cherry ice cream. I hope that following my instructions you will be able to make such a cake for February 23rd. I specially post it a little in advance. As you can see, this is a cake with fondant decoration. And you can see cakes for February 23rd with cream at.
Cake for February 23rd - recipe with photo
If you want to bake a cake, as in the photo, in the shape of a woman’s breast, then you will need 2 biscuits - one in the shape of a heart - it will be the base - and one more to cut out the actual breast.
Biscuits:
Heart-shaped biscuit
1 and 1/3 tbsp. Sahara,
1 and 1/3 tbsp. flour
3 tbsp. spoons of cocoa (if you take Russian cocoa, then more is possible)
Round sponge cake (I baked 24 cm)
5 eggs (it should not be high),
almost a full glass of sugar (we need five-sixths of a glass)
almost a full glass of flour
2 tbsp. spoons of cocoa (three Russian)
Cream
400 grams frozen cherries
200 g sugar
20 g starch
700 ml cream 33-35%
Syrup
100 g sugar
100 g water
Making a cake for your loved one with your own hands
- First, bake two chocolate biscuits. For the heart cake, separate 8 whites from the yolks and beat until stiff peaks form. Then, continuing to beat, gradually add 1 and 1/3 cups of sugar. Then beat the yolks for about two minutes until they increase in volume. Sift 1 and 1/3 cups of flour onto the whipped whites, pour the yolks on top and sift 3 tablespoons of cocoa. Mix gently with a spoon or spatula. Place in a pan lined with parchment and bake in an oven preheated to 190 degrees for about 30 minutes (until dry). Step-by-step recipe for chocolate sponge cake.
2. We bake a round sponge cake using the same principle from 5 eggs, almost a full glass of sugar and almost a full glass of flour and 2-3 tablespoons of cocoa.
3. Run a knife between the biscuits and the sides of the pans and remove the biscuits. Then cut into cakes. Read how to cut evenly into cakes using only a knife.
4. While the biscuits are baking, you can already cook the syrup for impregnation. Bring 100 grams of sugar and 100 grams of water to a boil and simmer for 5 minutes until slightly thickened. If desired, you can flavor it with 10 grams of cognac, cherry liqueur or cherry syrup. Read about cooking syrup step by step.
5. While the biscuits are baking, you can also prepare the cherry sauce for the cream. Mix 400 grams of frozen cherries with 200 grams of sugar in a saucepan and bring to a boil.
6. Dissolve 20 grams of starch (I used corn starch, but you can also use potato starch) in a small amount of water.
Add to the boiling cherries, bring to a boil and cook, stirring for a while, until thickened, at least until it becomes like jelly. It took me about 5 minutes. As it cools, the sauce will thicken even more. Cool the biscuits and sauce.
7. Make a cream filling. I read different recipes for this cream on the Internet, and like a real ice cream - sugar, eggs, butter. And with ice cream. But I make it very simply and it tastes like berry ice cream.
Whip 700 grams of cream. If your cake is not as big as mine, then smaller. I have 3 kg, but this is with the weight of the mastic.
8. Add cherry sauce. Do not stir too much so that streaks of sauce remain.
9. Assembling the heart cake. Soak the cake with syrup and apply cream. I do this in the form in which the cake was baked, then it is more convenient to level it. But it’s possible without a form, of course.
This is how we collect the whole cake. I got 4 cake layers, about a centimeter of cream between them, a tall cake.
10. For the breasts, I took two identical cups so as not to have to worry about alignment. Be sure to put cling film in them so that you can take out our cake later. Cut out circles from the biscuit and place on the bottom.
12. I put all the cake preparations in the refrigerator for several hours (soaked on top and covered with cling film so that they did not harden)
Cake for February 23rd made from mastic - recipe with step by step photos
- Now let's start assembling and decorating. We remove the blanks from the cups (pull them out by the cling film). We place the blanks on the base.
2. Next, I smoothed it out a little with cream, filling in all the unevenness. I also made “confectionery plaster” - mixing the biscuit with cream until a not very hard mass is obtained that is easy to spread. When whipped with a mixer, a homogeneous mass is obtained from the sponge cake and cream (or you can first crumble the sponge cake in a food processor). I used this plaster to shape the chest, trimming it here and there with a knife. You can use any cream under the mastic, for example, butter + condensed milk one to one.
